
Meta Pixel experience setup and audience tracking
Meta Pixel is a Tag Experience that defines audiences and tracks them via Meta Pixel events. For an overview of how Tag Experiences work and when to use them, see Tag Experiences.
Meta Pixel experiences allow you to:
- Improve your ranking on audience auditors like Comscore by re-engaging users who have not visited your site within the last 30 days. Read more.
- Turn lovers into subscribers by re-engaging them through targeted campaigns. Read more.
- Increase your subscriber base with lookalike audiences built from your existing subscribers and lovers. Read more.
- Target funnel dropouts by configuring 2 pixels: one tracking users who entered your subscription funnel and another tracking your subscribers. Target Facebook users in the first audience who do not belong to the second.
To get the Meta Pixel Experience working, create an Experience with the desired audience segment and create a Meta Pixel on Facebook.
Marfeel Experience configuration
Section titled “Marfeel Experience configuration”Follow these steps to configure the Meta Pixel Experience:
-
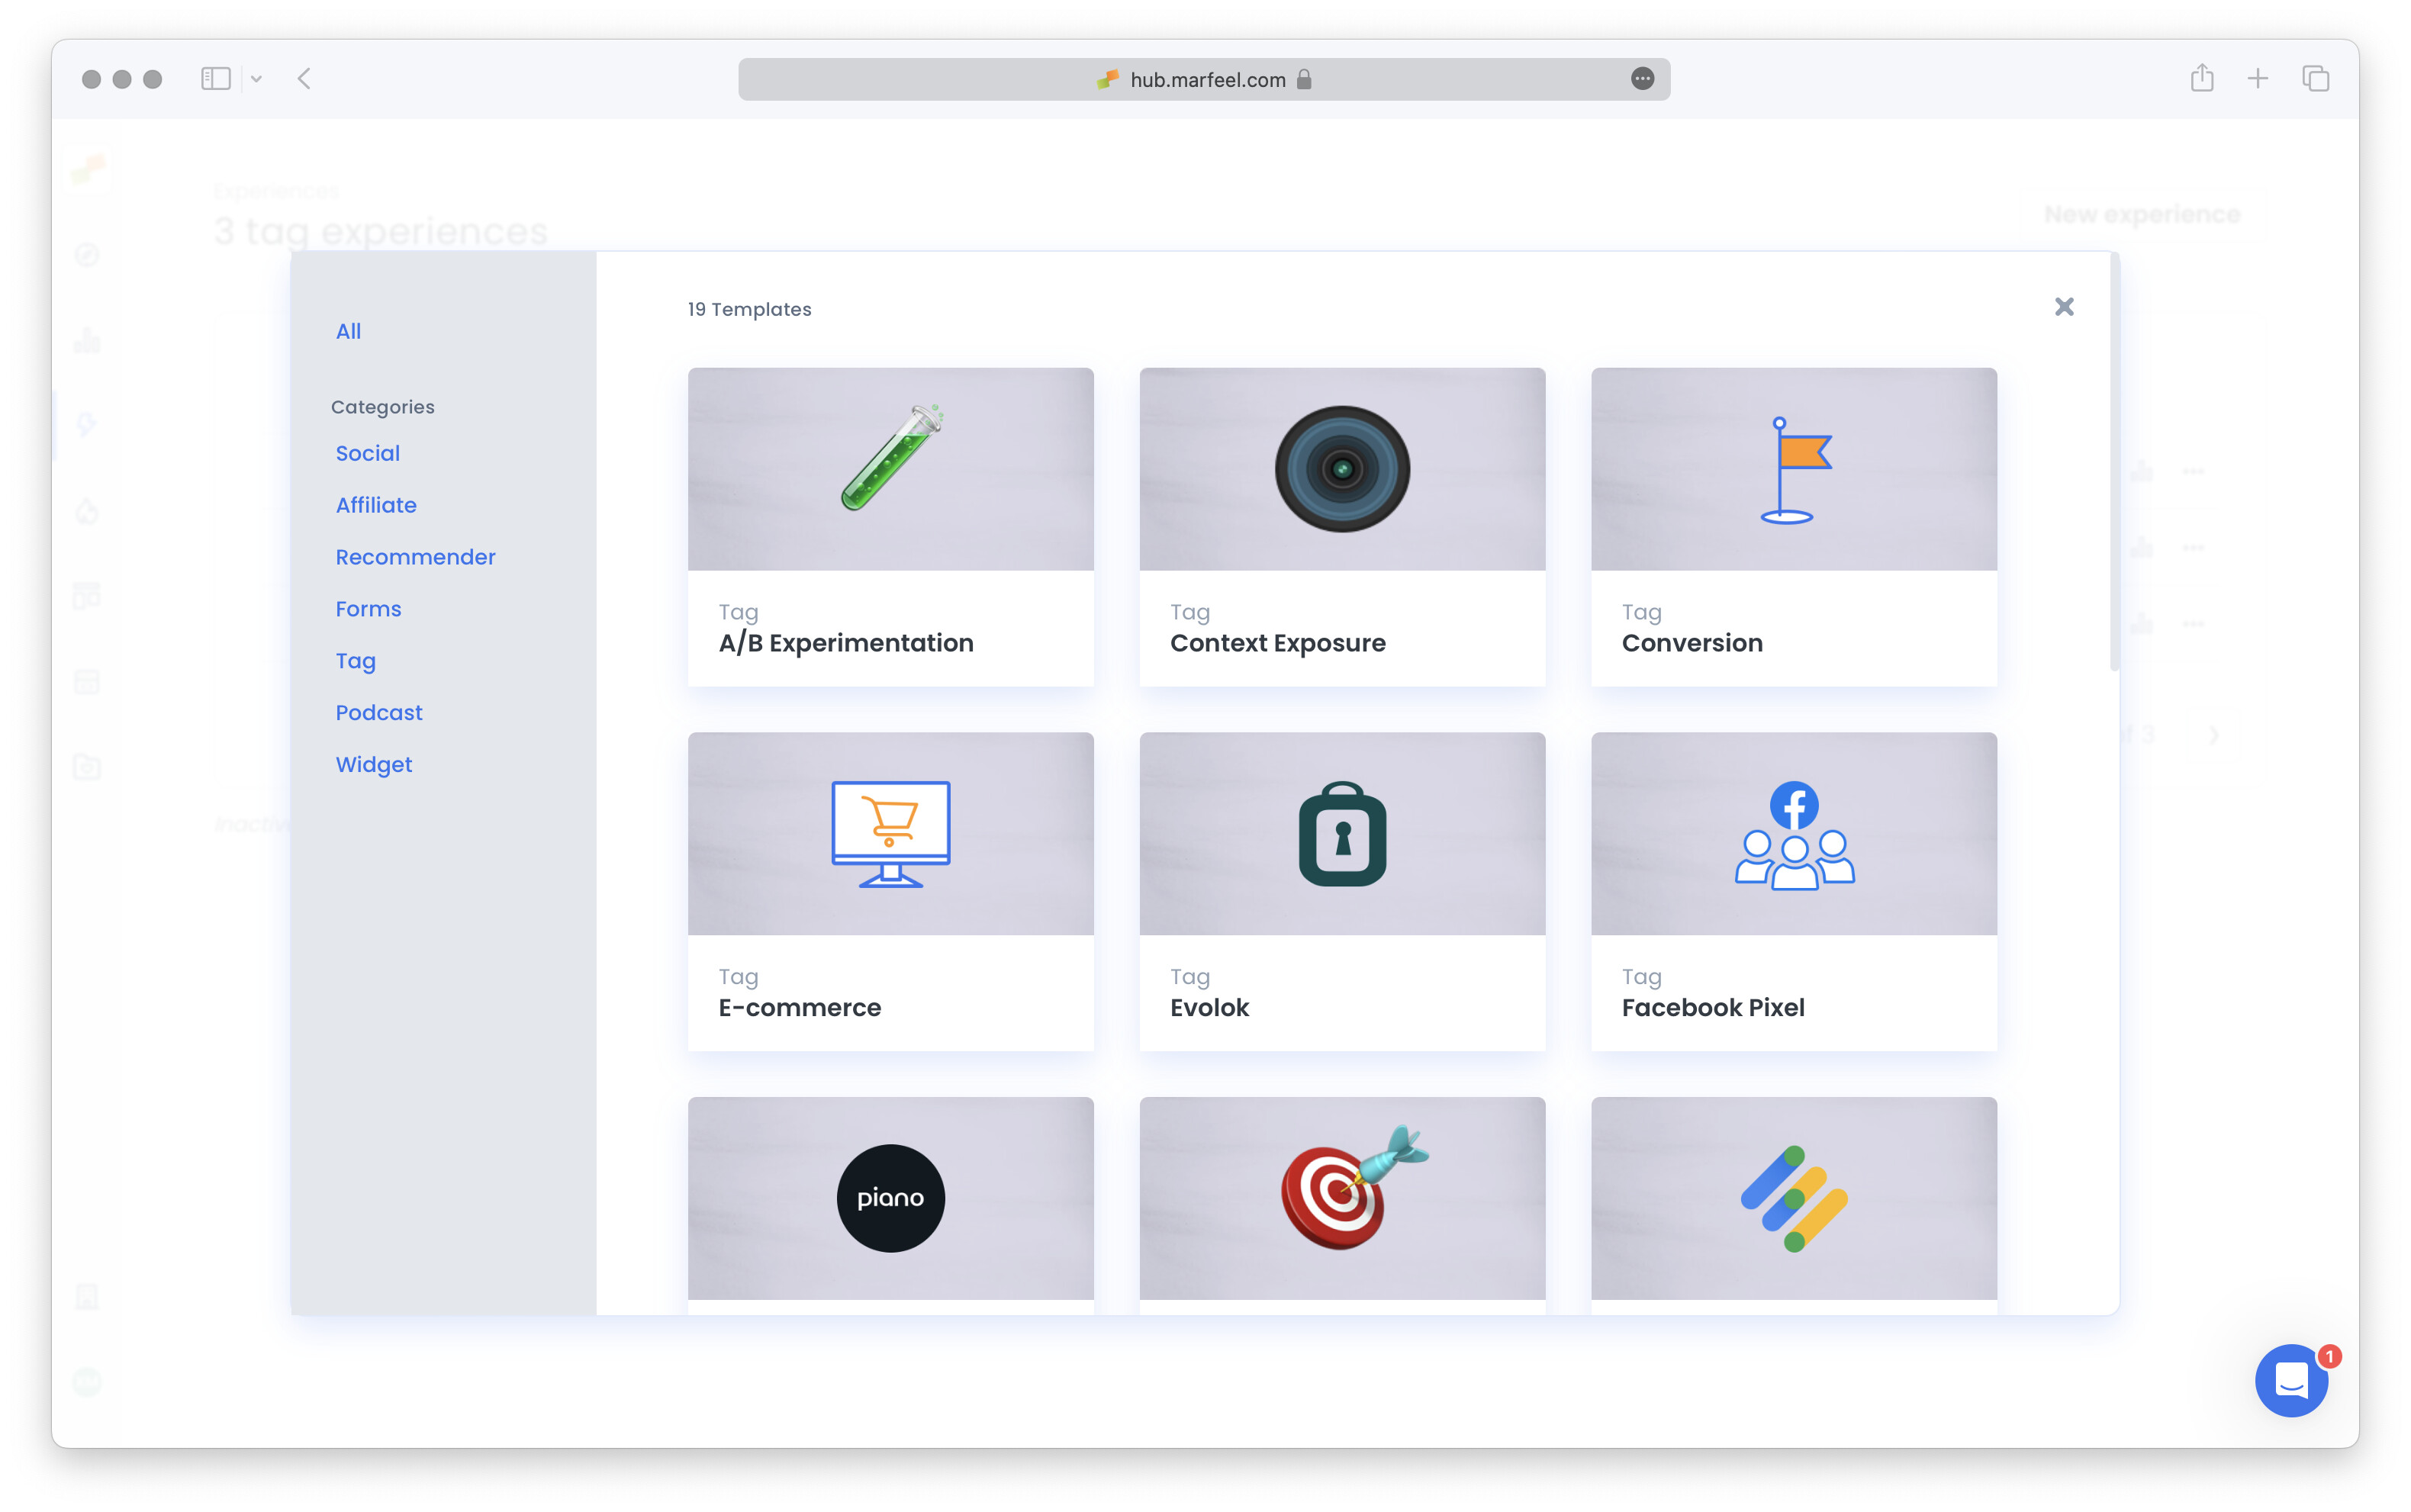
In Experience Manager, click the New Experience button and navigate to the Tag section. Select Facebook Pixel.
-
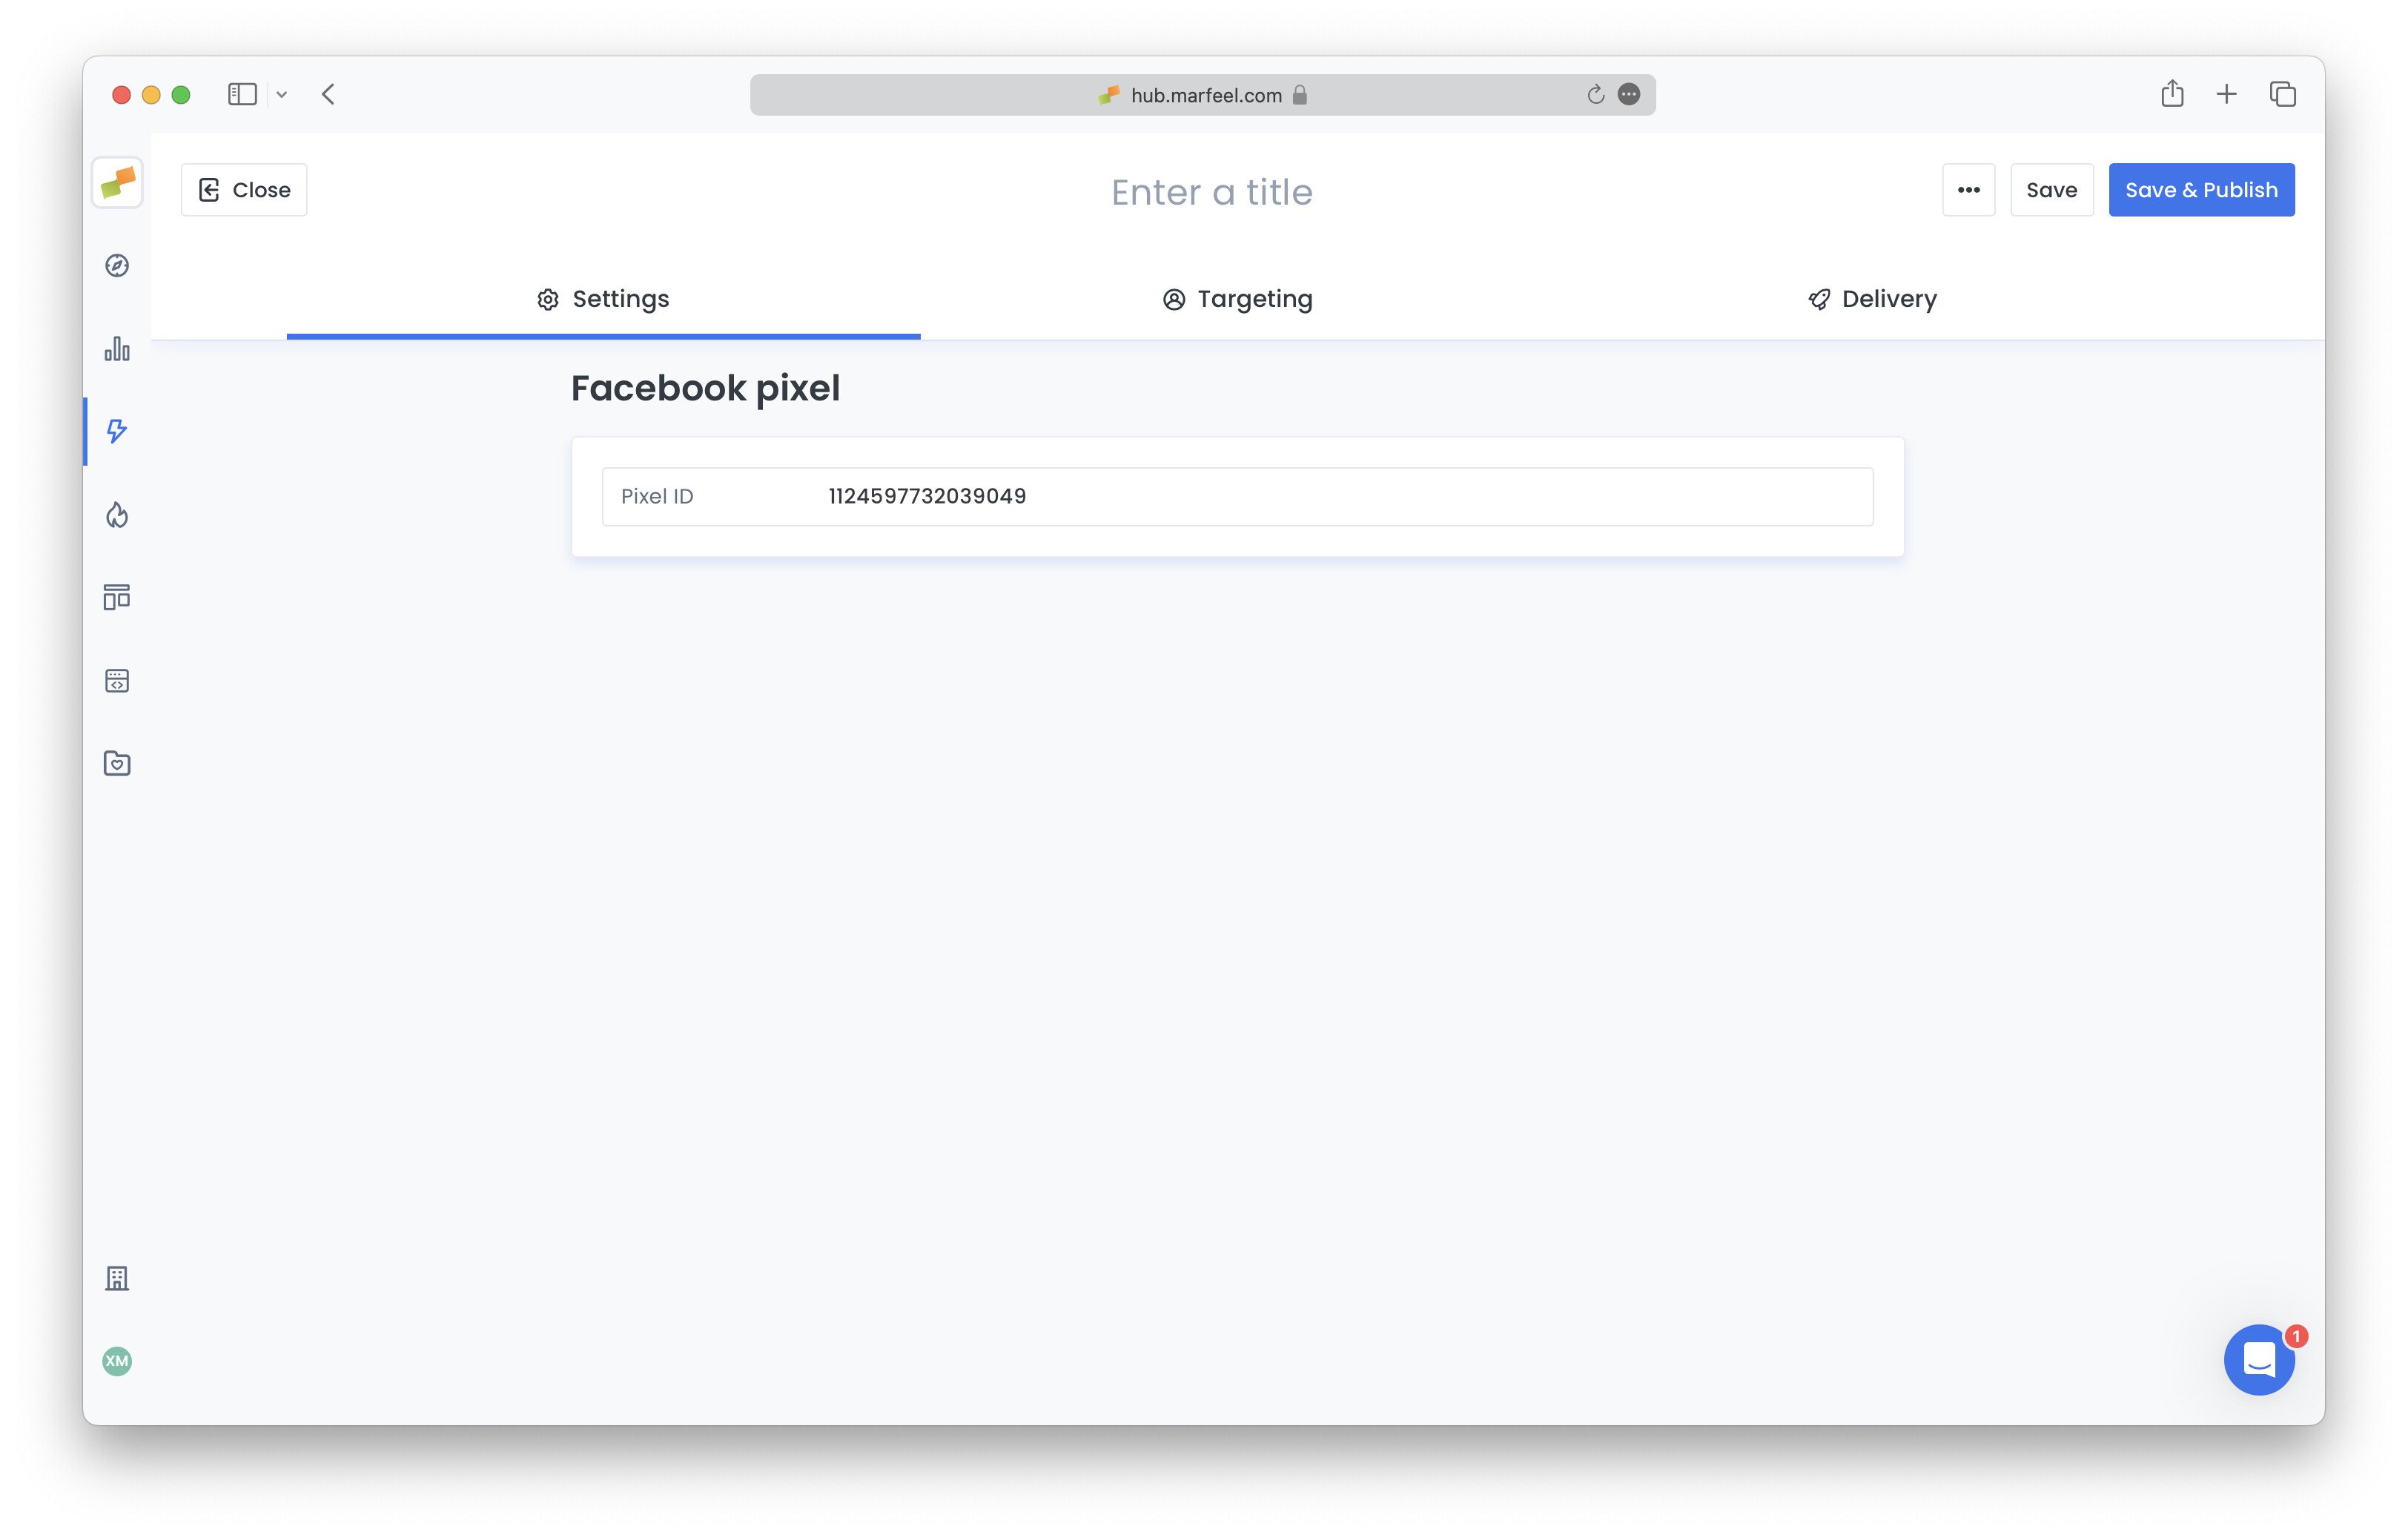
On the Settings tab, enter the Meta Pixel ID you want to trigger.
-
Define your audience using the targeting and delivery options to configure when Meta Pixel fires. For most use cases, one daily event per user is sufficient.
-
Publish the experience. Initial data starts appearing in Facebook’s Events Manager within 20 minutes.
Improve traffic auditor rankings
Section titled “Improve traffic auditor rankings”Site traffic auditors like Comscore, Nielsen, Quantcast, and GFK measure monthly unique users to determine publisher rankings. Re-acquiring users who visited previously but have not returned in 30 days directly increases your monthly unique user count and improves your ranking position.
This strategy uses Meta Pixel to build an audience of lapsed users, then re-engages them through targeted campaigns on Facebook and Meta properties.
Setup workflow
Section titled “Setup workflow”Prerequisites: Complete Marfeel Experience configuration and obtain your Meta Pixel ID before starting.
-
Configure your Marfeel Experience targeting:
- In the Targeting tab, select the domain you want to increase users for
- Leave other targeting broad to capture maximum user exposure
- In Delivery tab, set frequency to 1 event per day per user (this captures users consistently without over-firing)
-
Create a Custom Audience in Meta:
- Navigate to Meta Audiences
- Click Create Audience > Custom Audience > Website
- Select your Meta Pixel as the source
- Configure audience rules:
- Include: All website visitors in the last 180 days (maximum window offered by Meta)
- Exclude: Website visitors in the last 30 days
- Name your audience descriptively (e.g., “Lapsed Users - 30-180 Days”)
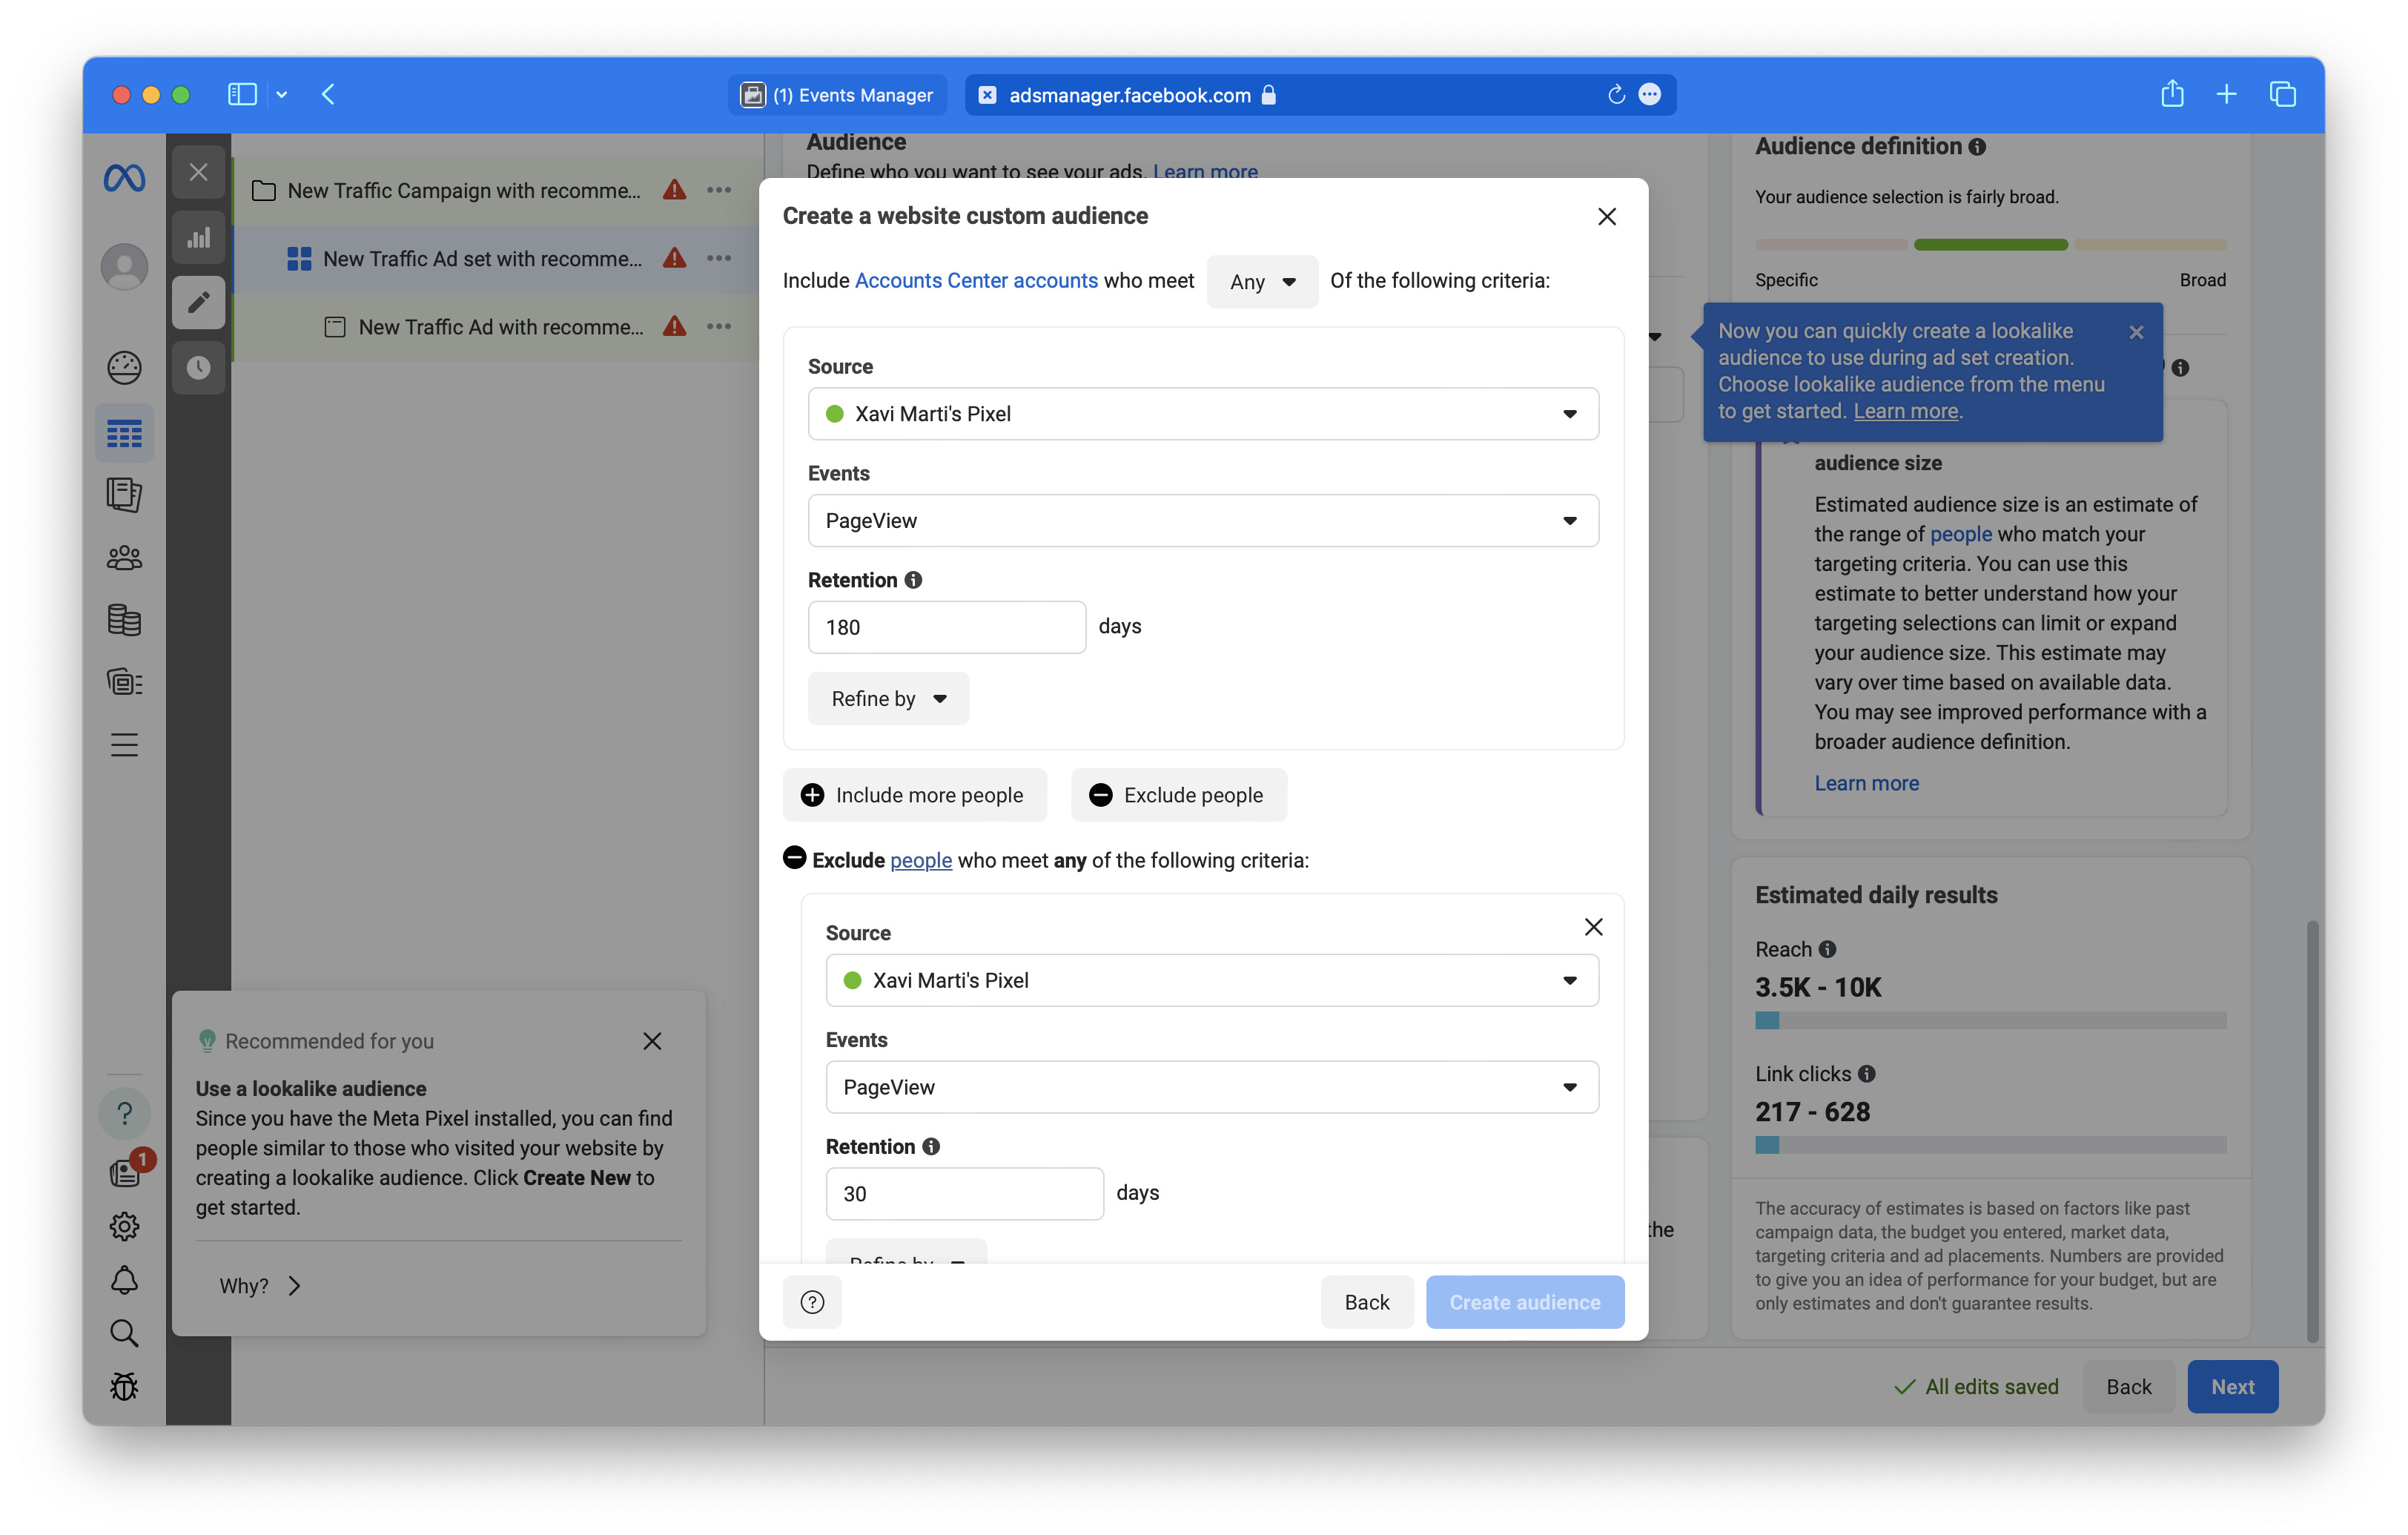
This audience captures users who showed interest in your content but have not returned recently, making them prime candidates for re-engagement.
-
Create a Traffic Campaign:
- Navigate to Meta Ads Manager
- Click Create > Traffic campaign objective
- Select your Custom Audience created in step 2
- Geographic targeting: Select the specific country you want to improve ranking in
- Why this matters: Site traffic auditors like Comscore only count domestic users in their metrics. If you are optimizing for U.S. Comscore ranking, only target United States users.
- Set budget based on desired re-engagement volume
-
Select high-performing content for ads:
Use content proven to drive engagement:
- Articles with high performance on Google Discover
- Homepage hero content with strong CTR
- Content with high Dark Social traffic (strong viral signals)
- Evergreen articles with sustained readership
Why this matters: Every click from the campaign contributes to your monthly unique user count. High-quality content increases the probability of re-engaging users who previously showed interest.
-
Monitor and optimize:
- Track campaign CTR and cost-per-click in Meta Ads Manager
- Monitor returning user traffic in your analytics platform
- Adjust audience exclusions (e.g., exclude last 7 days instead of 30 if budget allows)
- Rotate ad creative using your best-performing content
Results to expect
Section titled “Results to expect”- Timeline: Initial traffic lift appears within 48 hours of campaign launch.
- Ranking impact: Traffic auditor rankings update monthly. Expect measurable impact after 1-2 complete monthly cycles.
- Efficiency: Re-engagement campaigns typically deliver higher CTR and lower CPC than cold audience acquisition because users already recognize your brand.
How to obtain your Facebook Pixel ID
Section titled “How to obtain your Facebook Pixel ID”Existing Pixel
Section titled “Existing Pixel”If you already have a Meta Pixel configured, obtain its ID by:
- Visit Facebook’s Events Manager
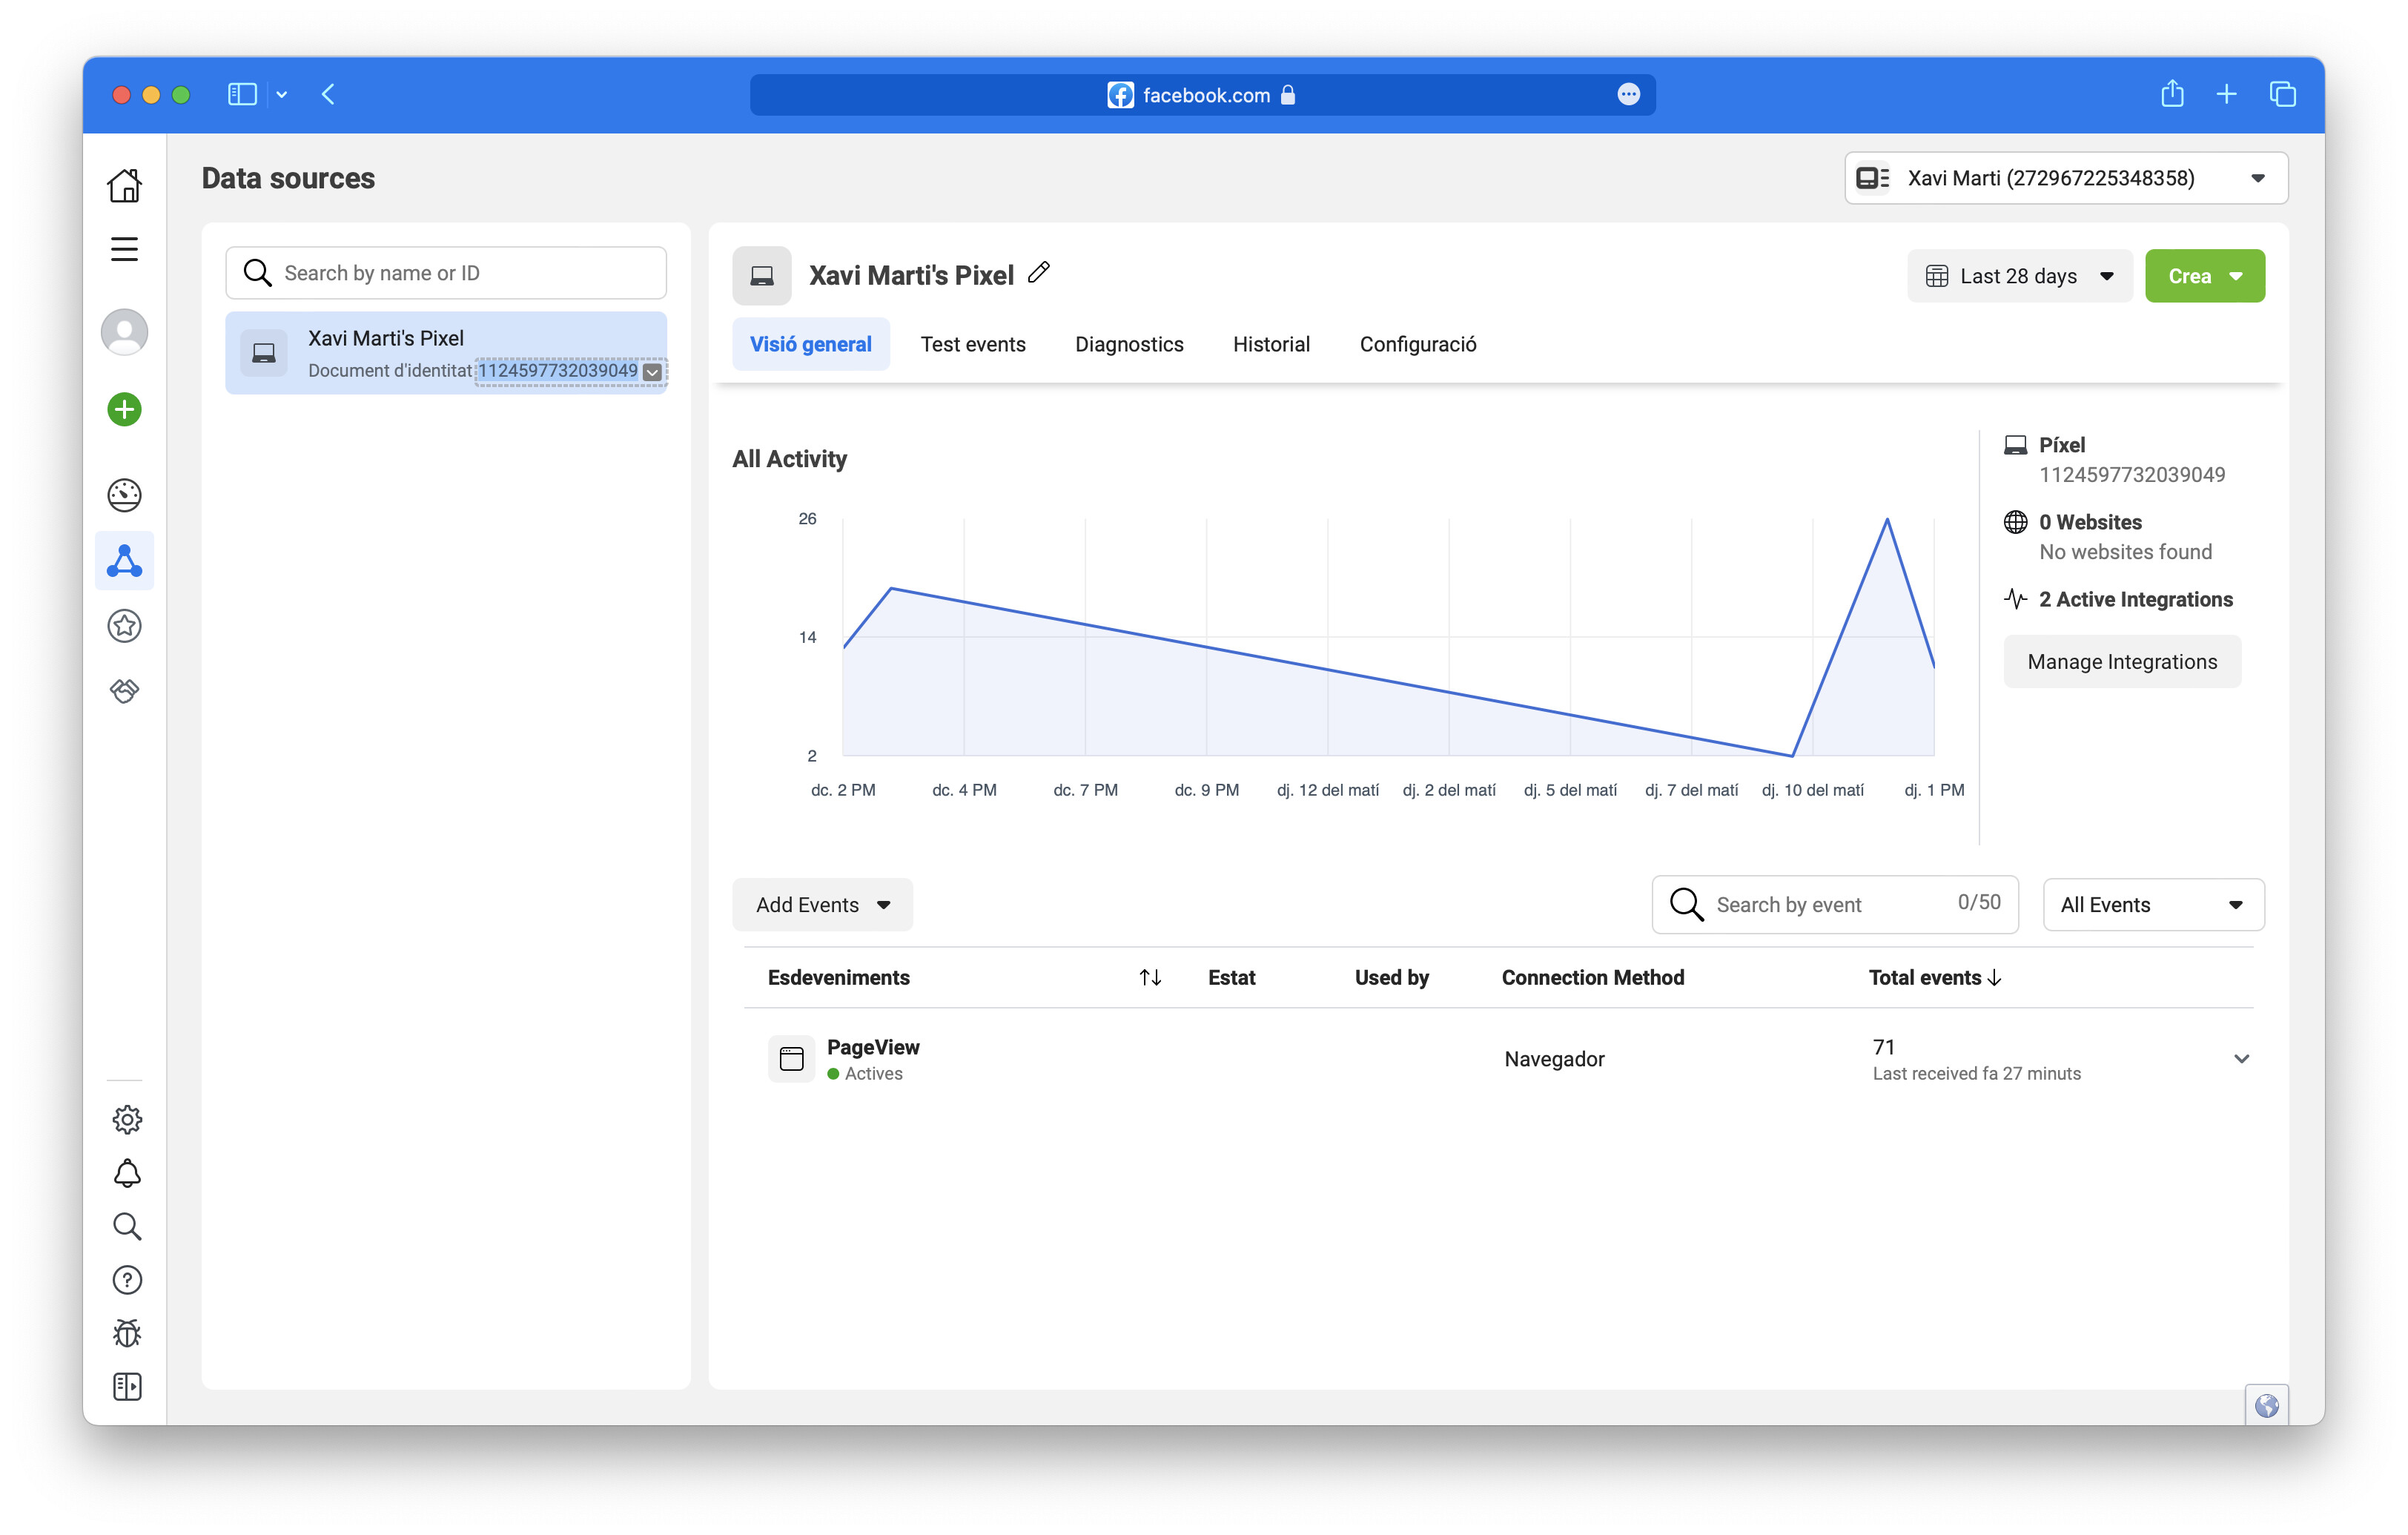
- Click on Data Sources in the sidebar
- Locate your pixel in the list. The ID appears in the left column.
Creating a new Pixel
Section titled “Creating a new Pixel”To create a Facebook Pixel, follow Facebook’s documentation. Below is a summary. Before starting, you need both a Meta Business Suite account and an active Ad Account.
-
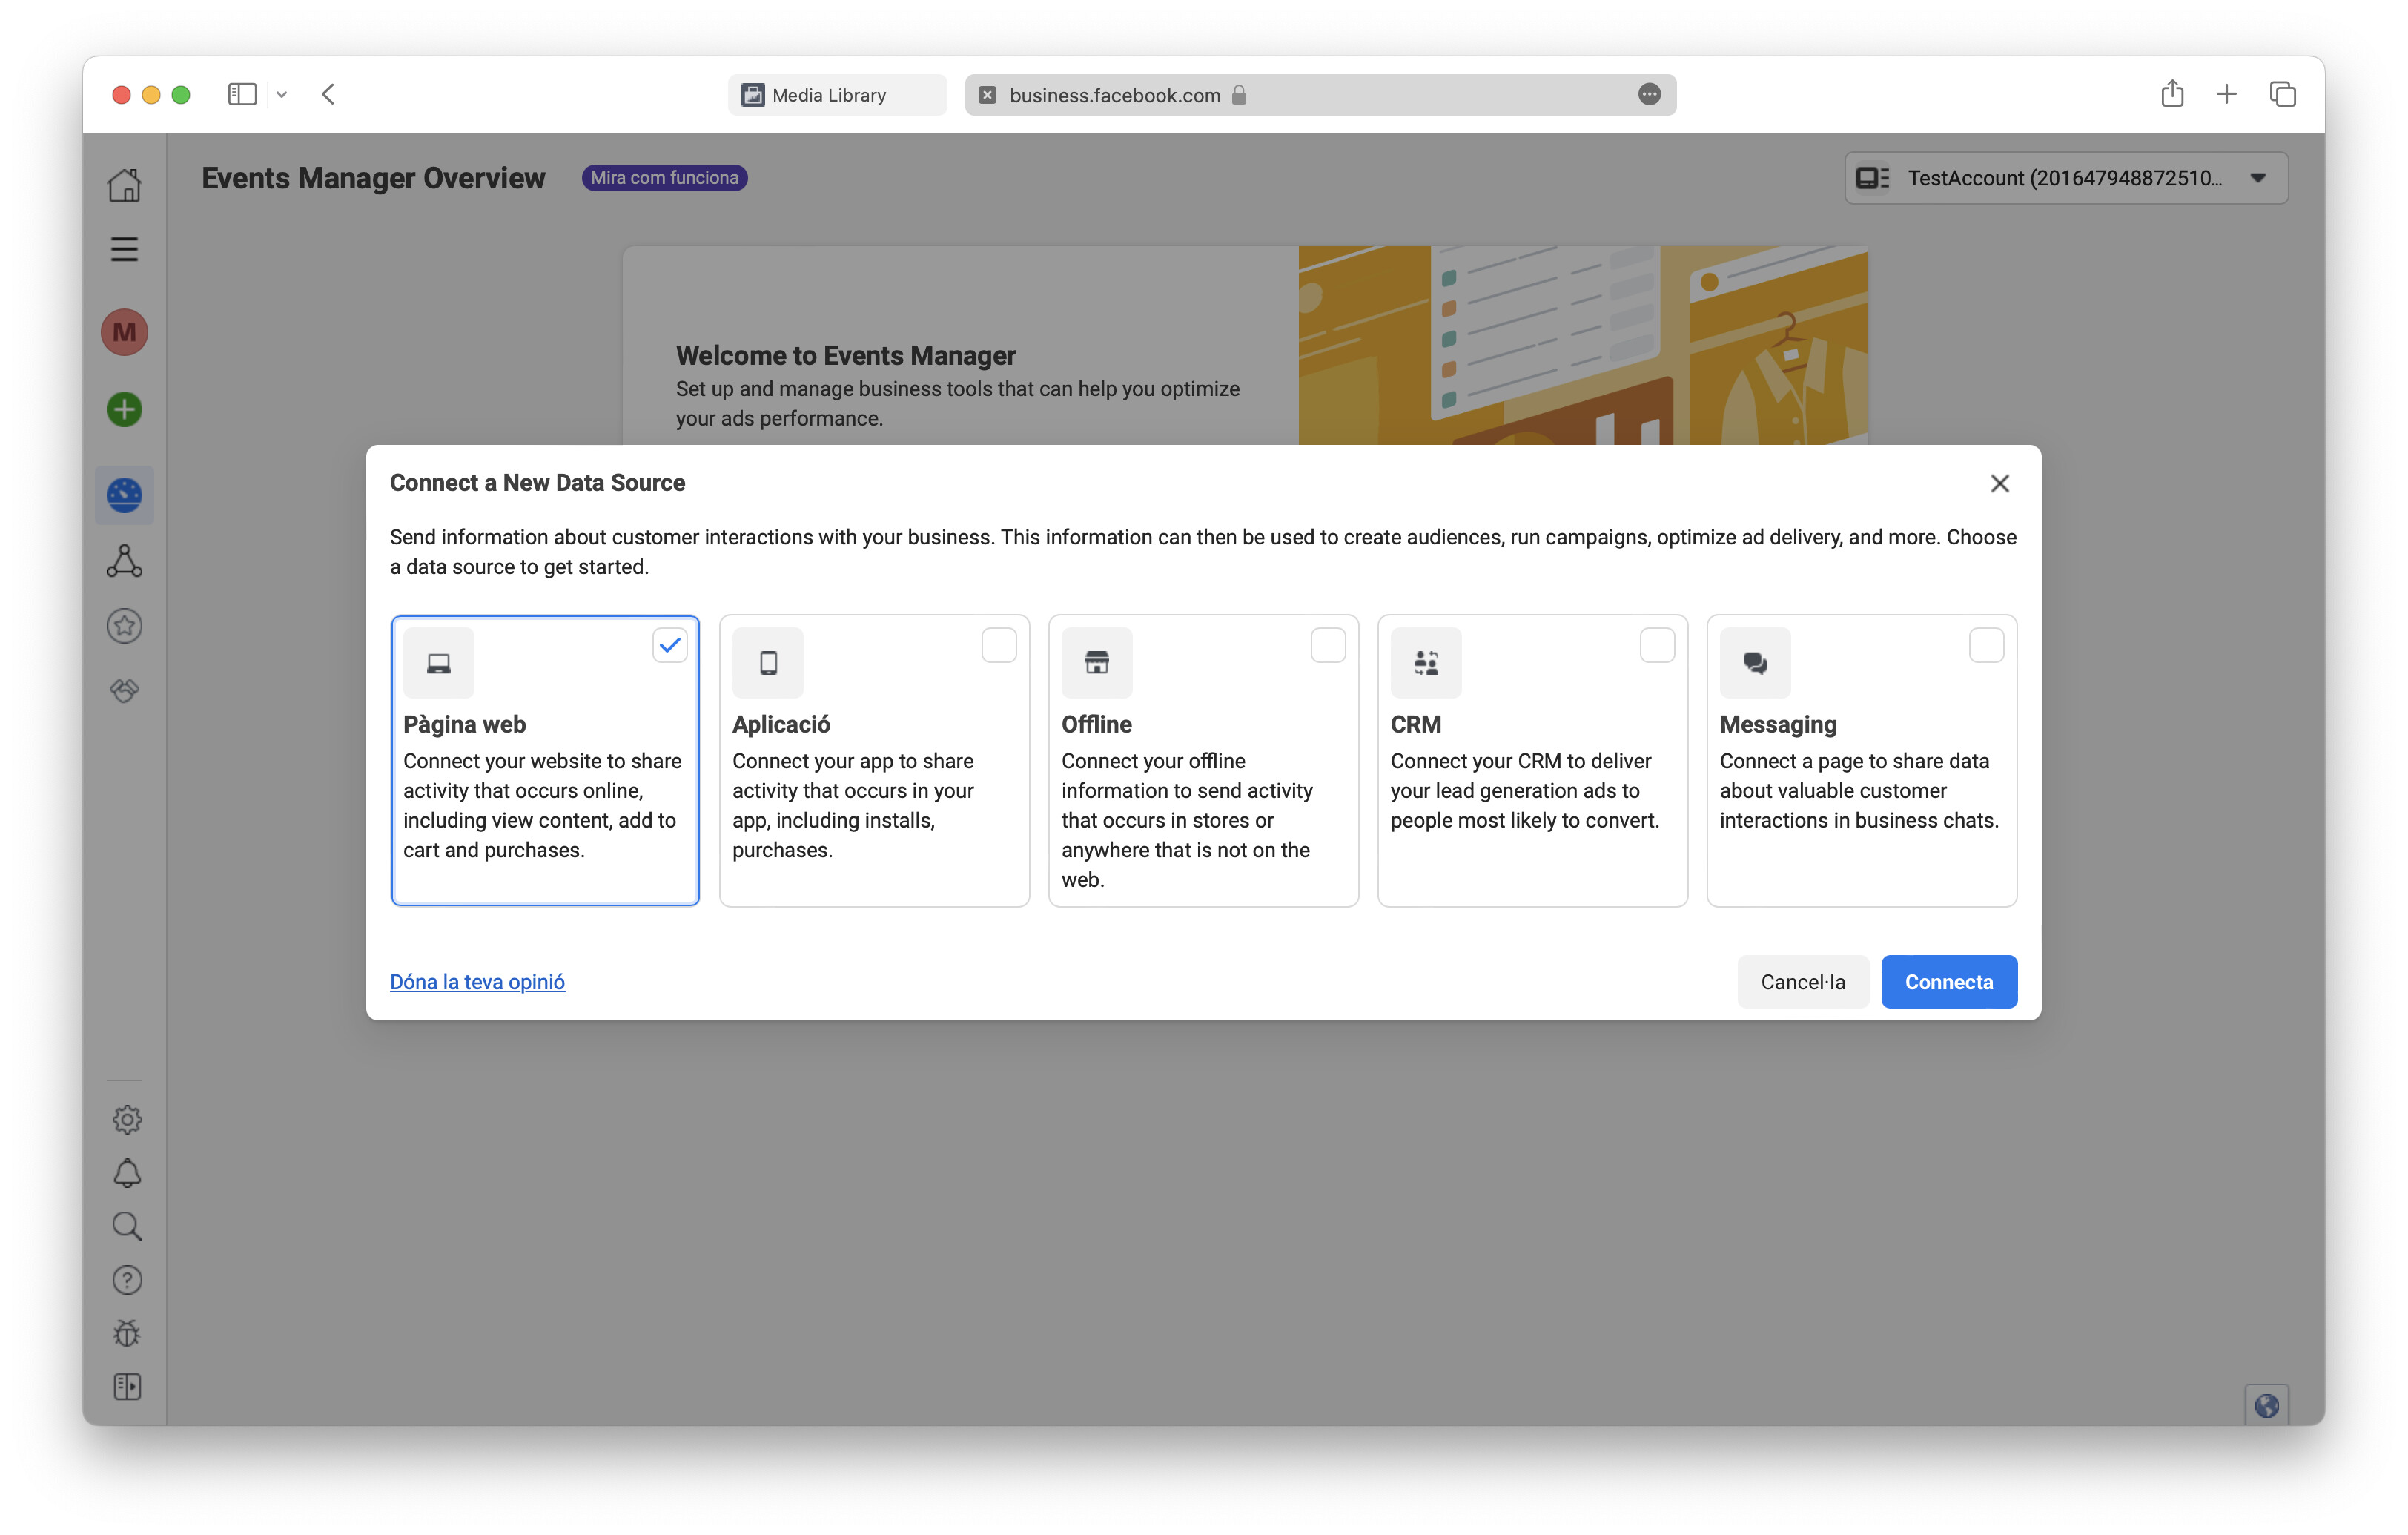
Navigate to Events Manager and click the + sign in the sidebar under Connect Data Sources. Select Web and continue.
-
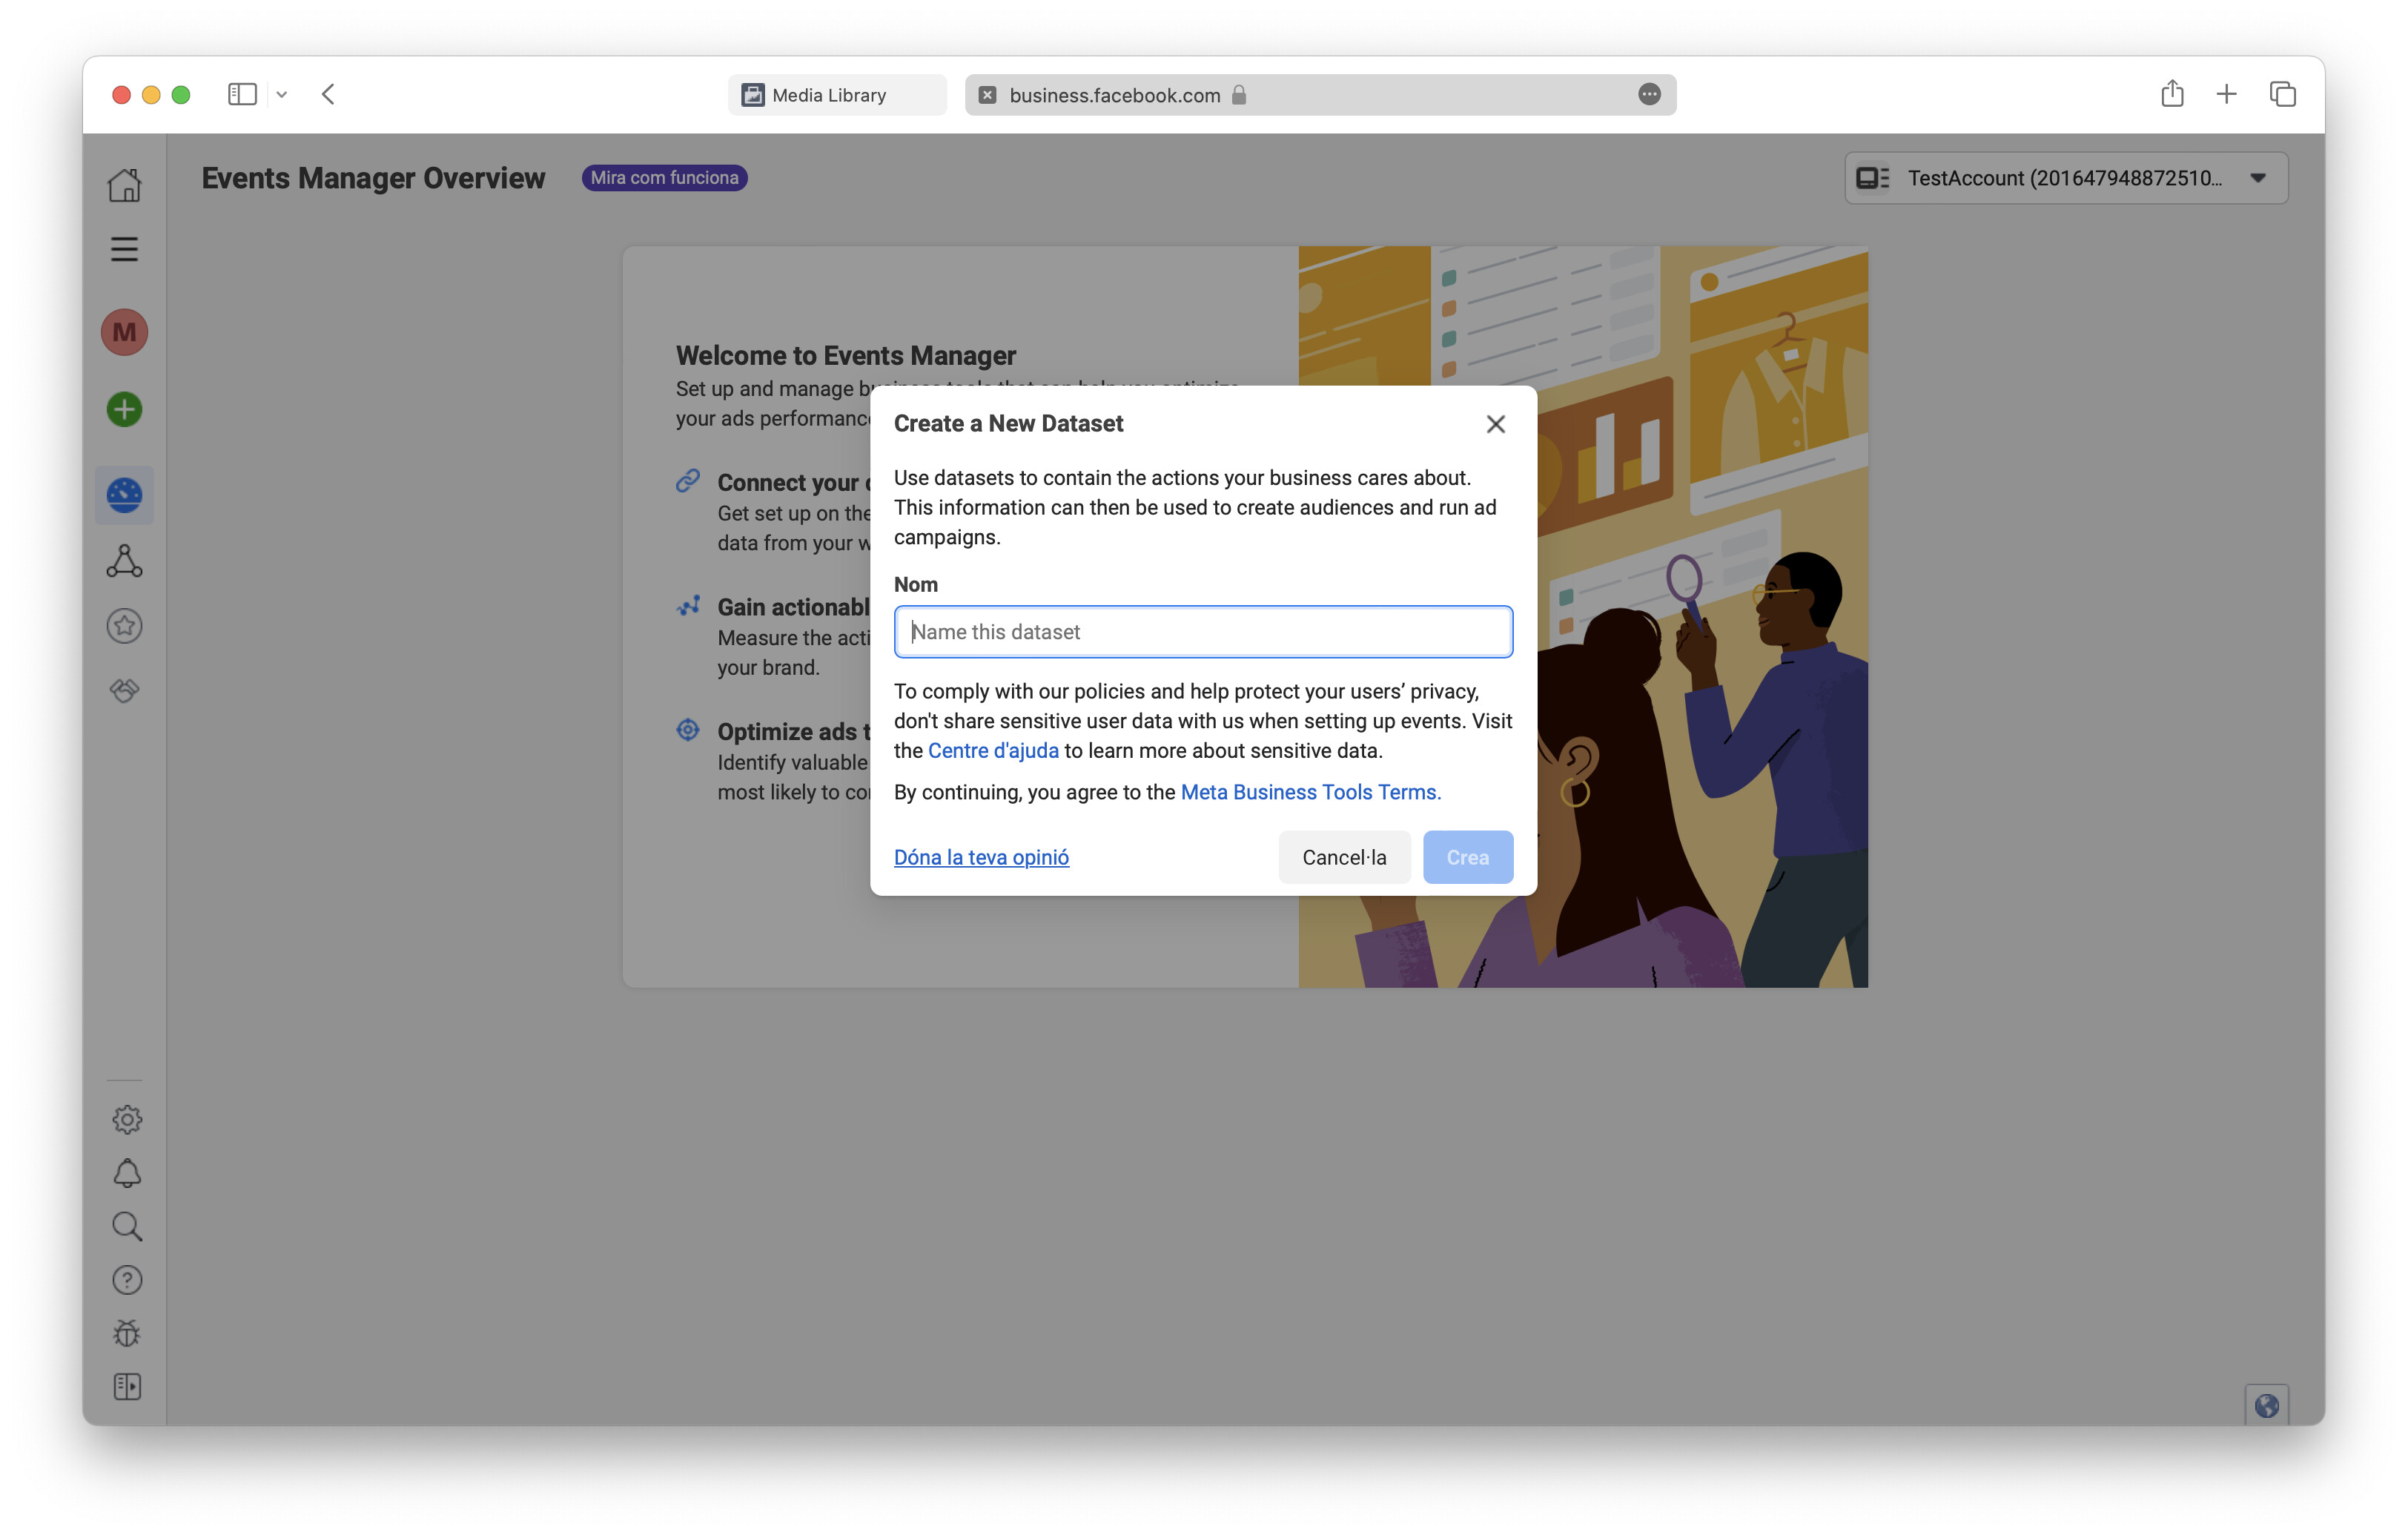
Provide a name for your new Dataset (Pixel name).
-
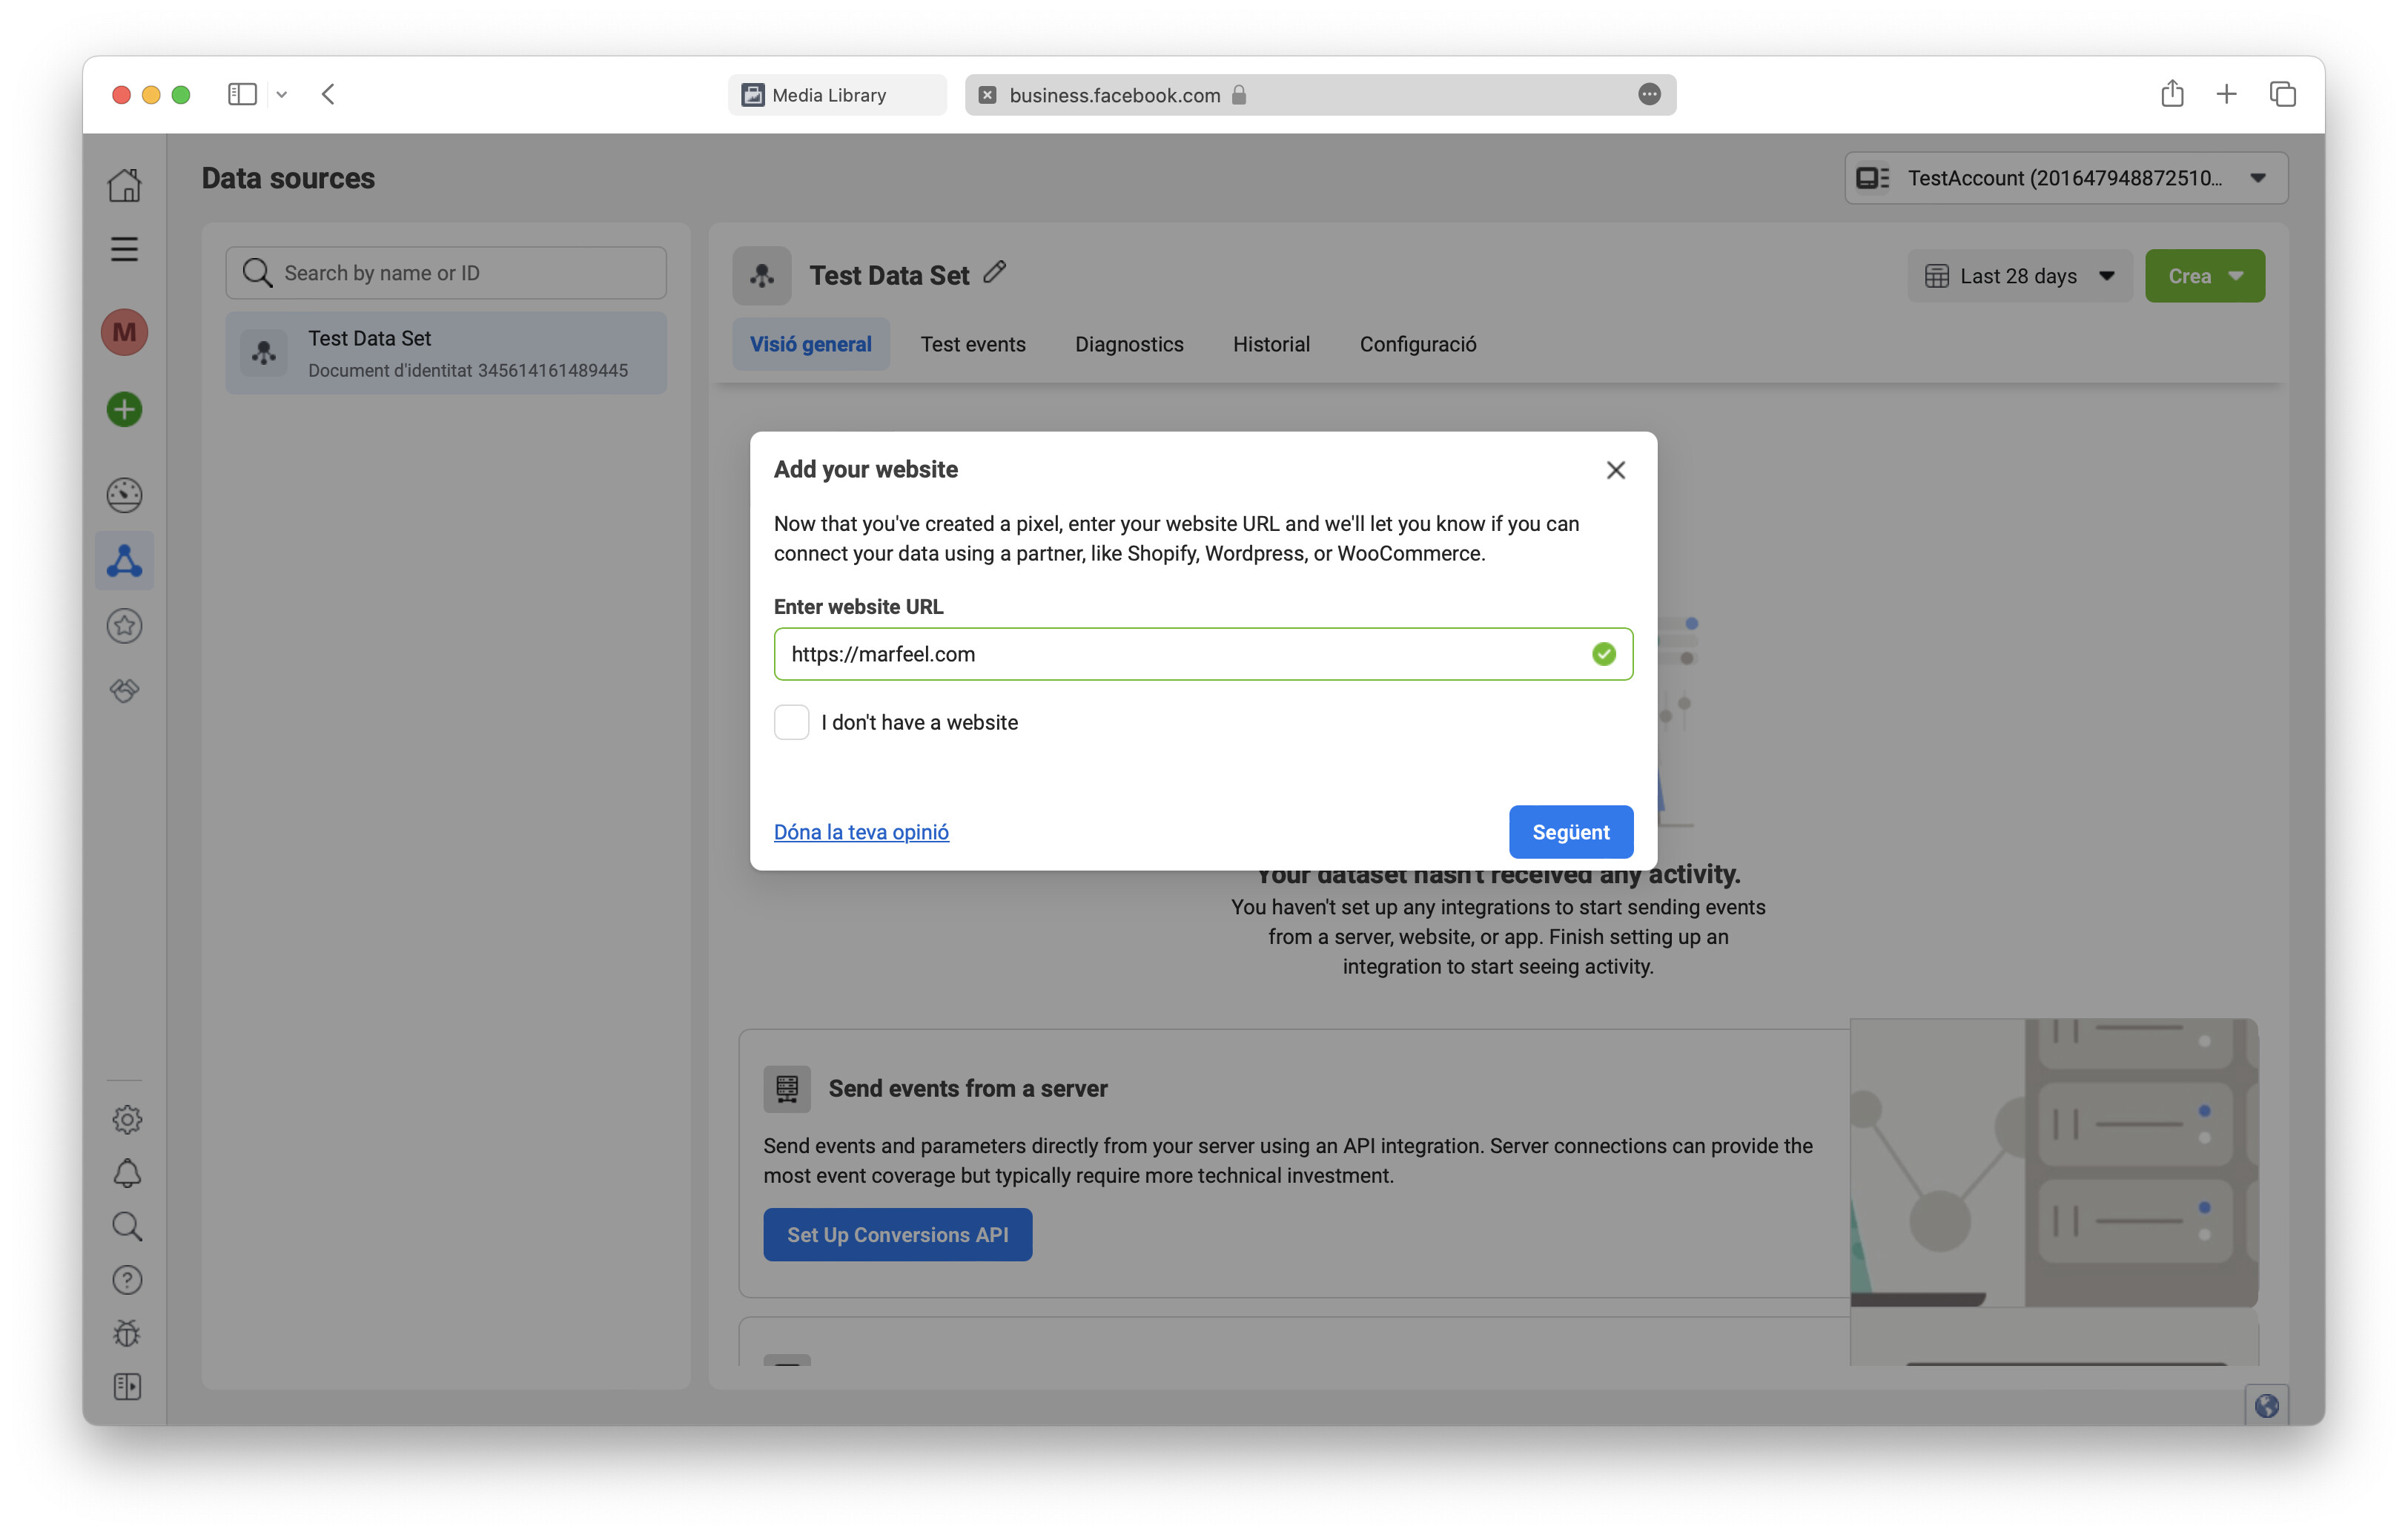
The remaining steps walk you through installing the code on your website. If you only send events to this pixel using Marfeel’s Meta Pixel Experience, skip through them.
-
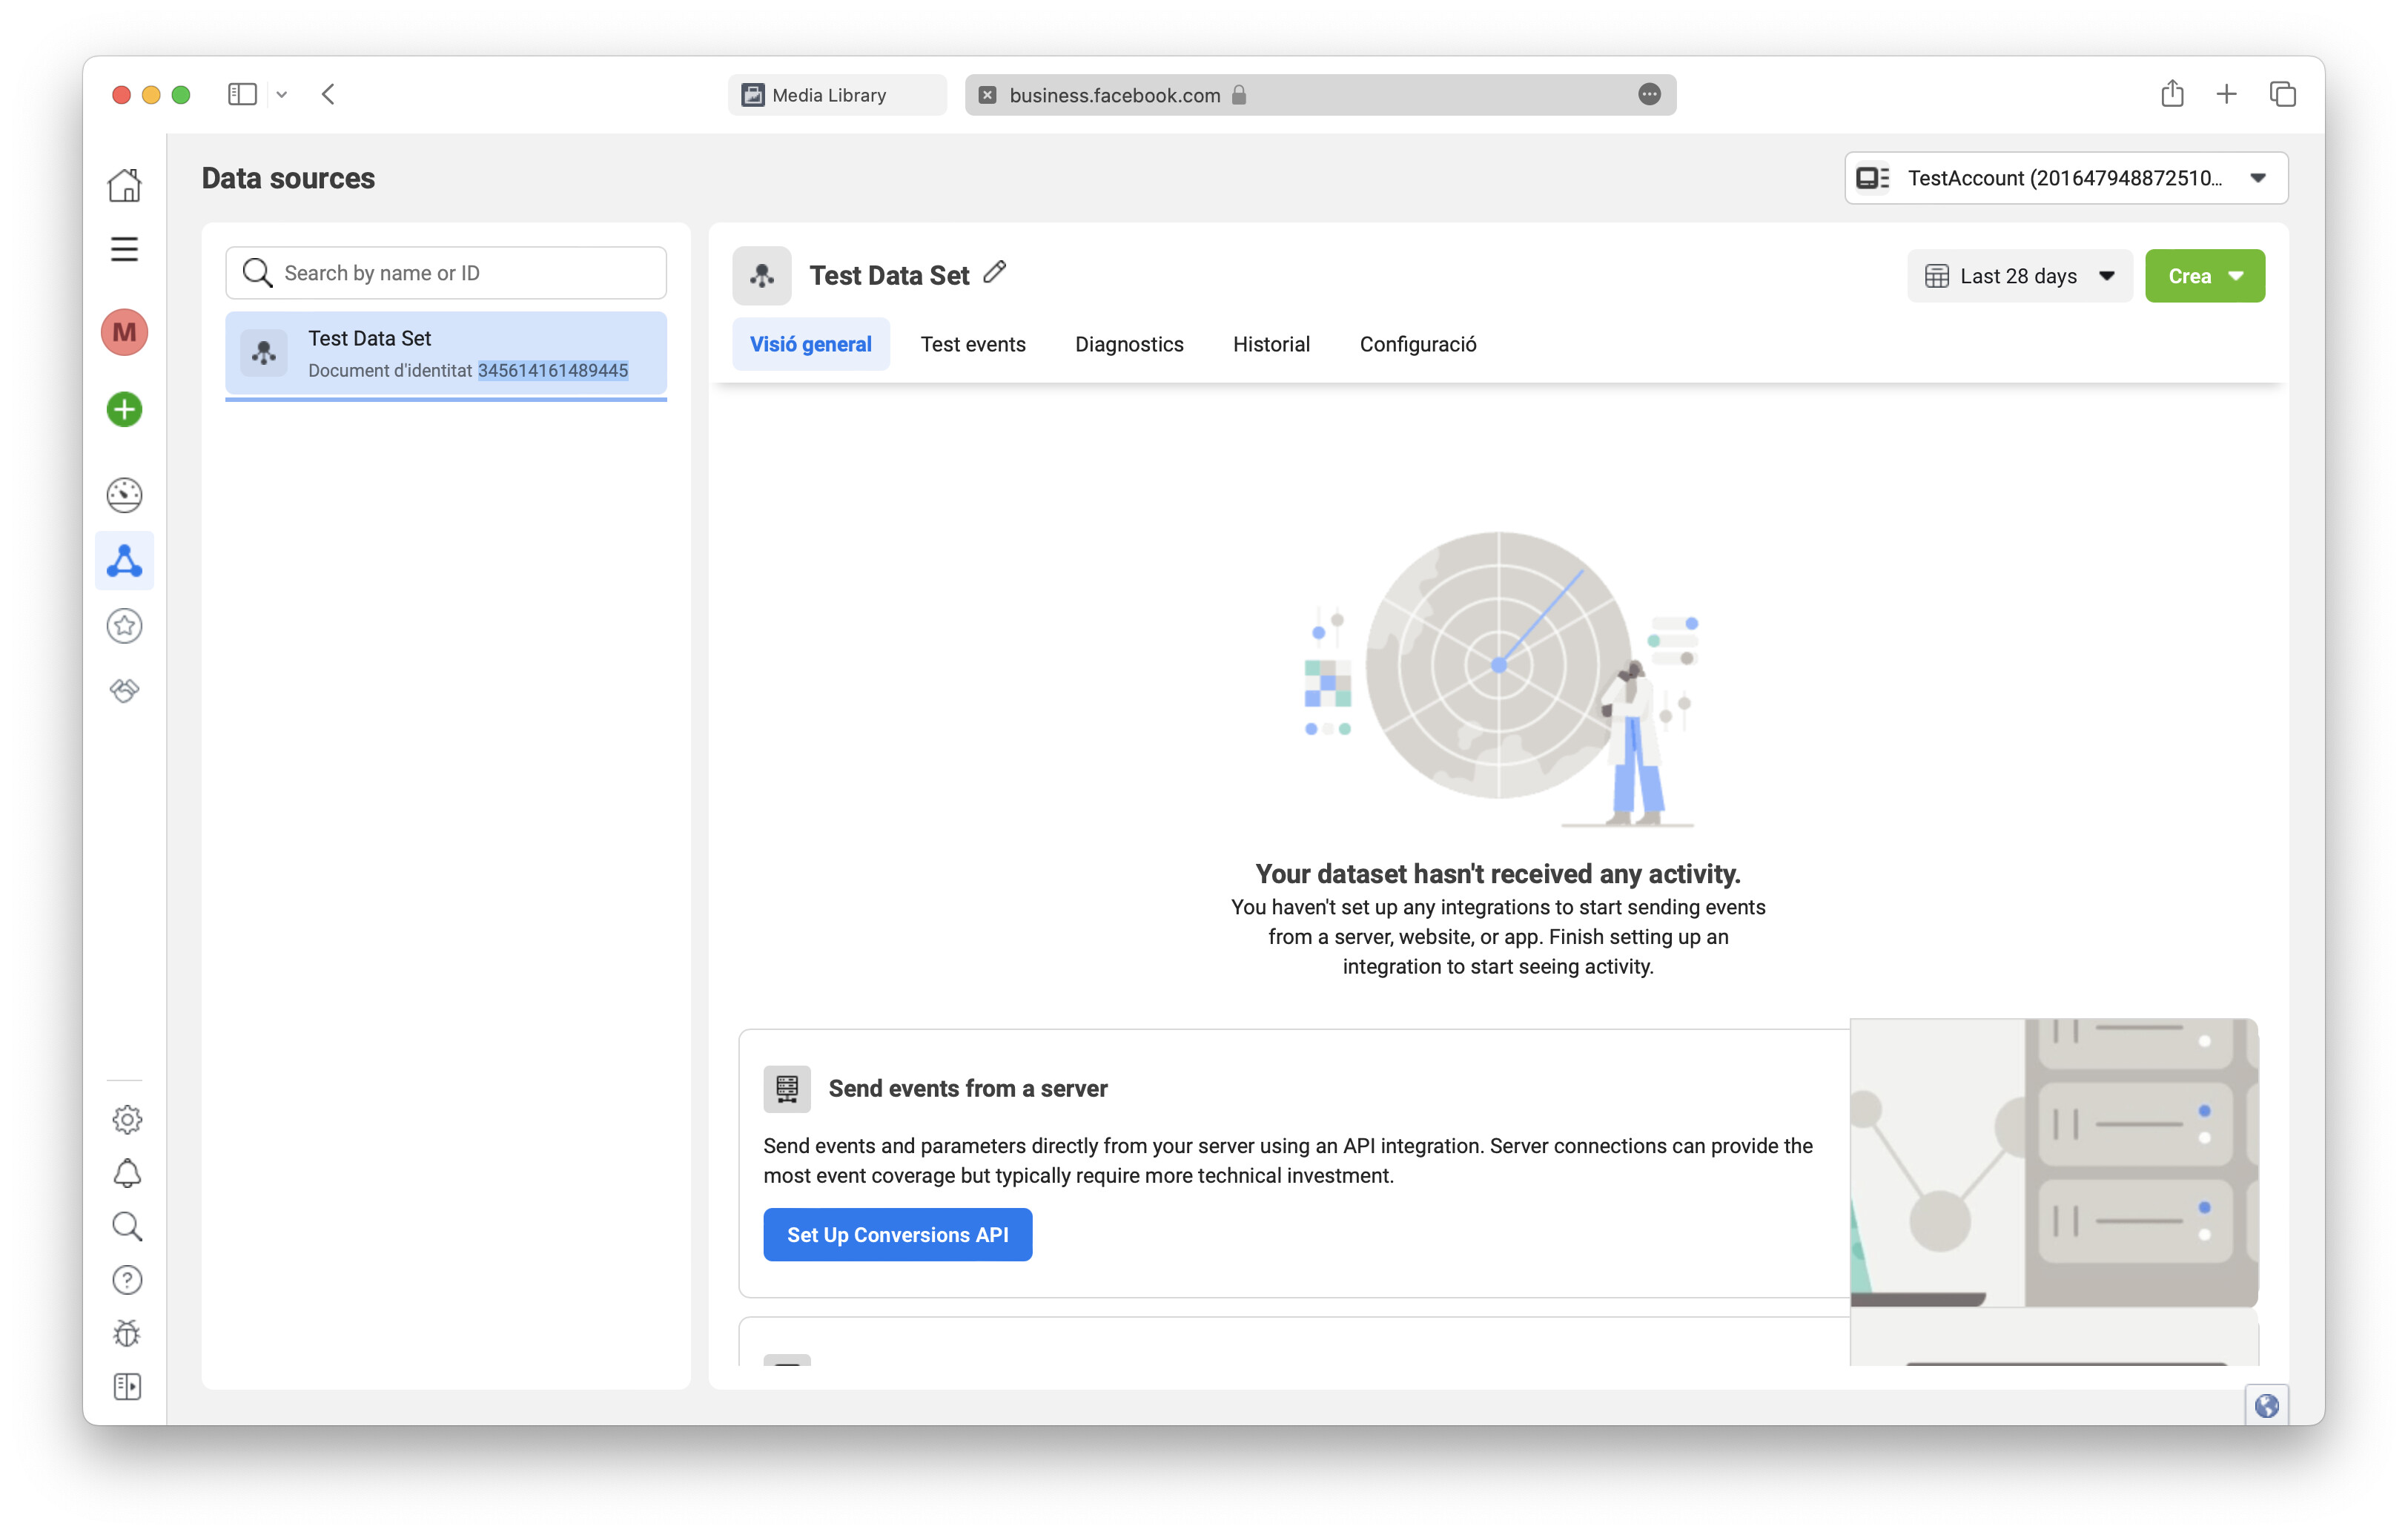
Once finished, navigate to Data Sources (triangle icon) in the sidebar. Copy your new Pixel’s ID from the left column.
How do I configure Meta Pixel as a Tag Experience?
In Experience Manager, click New Experience, navigate to the Tag section, and select Facebook Pixel. Enter your Meta Pixel ID in the Settings tab, define audience targeting and delivery frequency, then publish. Data starts appearing in Facebook Events Manager within 20 minutes.
How can Meta Pixel help improve Comscore rankings?
Create a Custom Audience in Meta that includes visitors from the last 180 days but excludes those from the last 30 days. Run a Traffic campaign targeting that audience in your specific country. Re-engaging lapsed users increases your monthly unique user count, which directly improves traffic auditor rankings.
Where do I find my Facebook Pixel ID?
Open Facebook Events Manager, click Data Sources in the sidebar, and locate your pixel in the list. The ID appears in the left column. If you do not have a pixel yet, click the + sign under Connect Data Sources, select Web, name your dataset, and skip the code installation steps if you are using Marfeel’s Meta Pixel Experience.