
A/B testing and experiment groups in Experience Manager
Every experience format supports A/B testing. Experimentation is a foundational capability of Experience Manager, not an add-on. Any experience can become a test in two clicks, with no code changes and no coordination overhead.
The cost of experimentation determines the rate of innovation. When experiments are expensive, requiring engineering resources, long implementation cycles, or executive approval, teams run fewer of them. Fewer experiments means slower learning.
Experience Manager makes experimentation nearly free. Everything is instrumented out of the box: every impression, click, close, and conversion is tracked automatically. No tagging, no analytics setup, no measurement headaches. You set up the test and the data is already there.
You can A/B test adding images to a recommender, changing a CTA color, or rearranging an entire page layout, and know within hours whether it actually works.
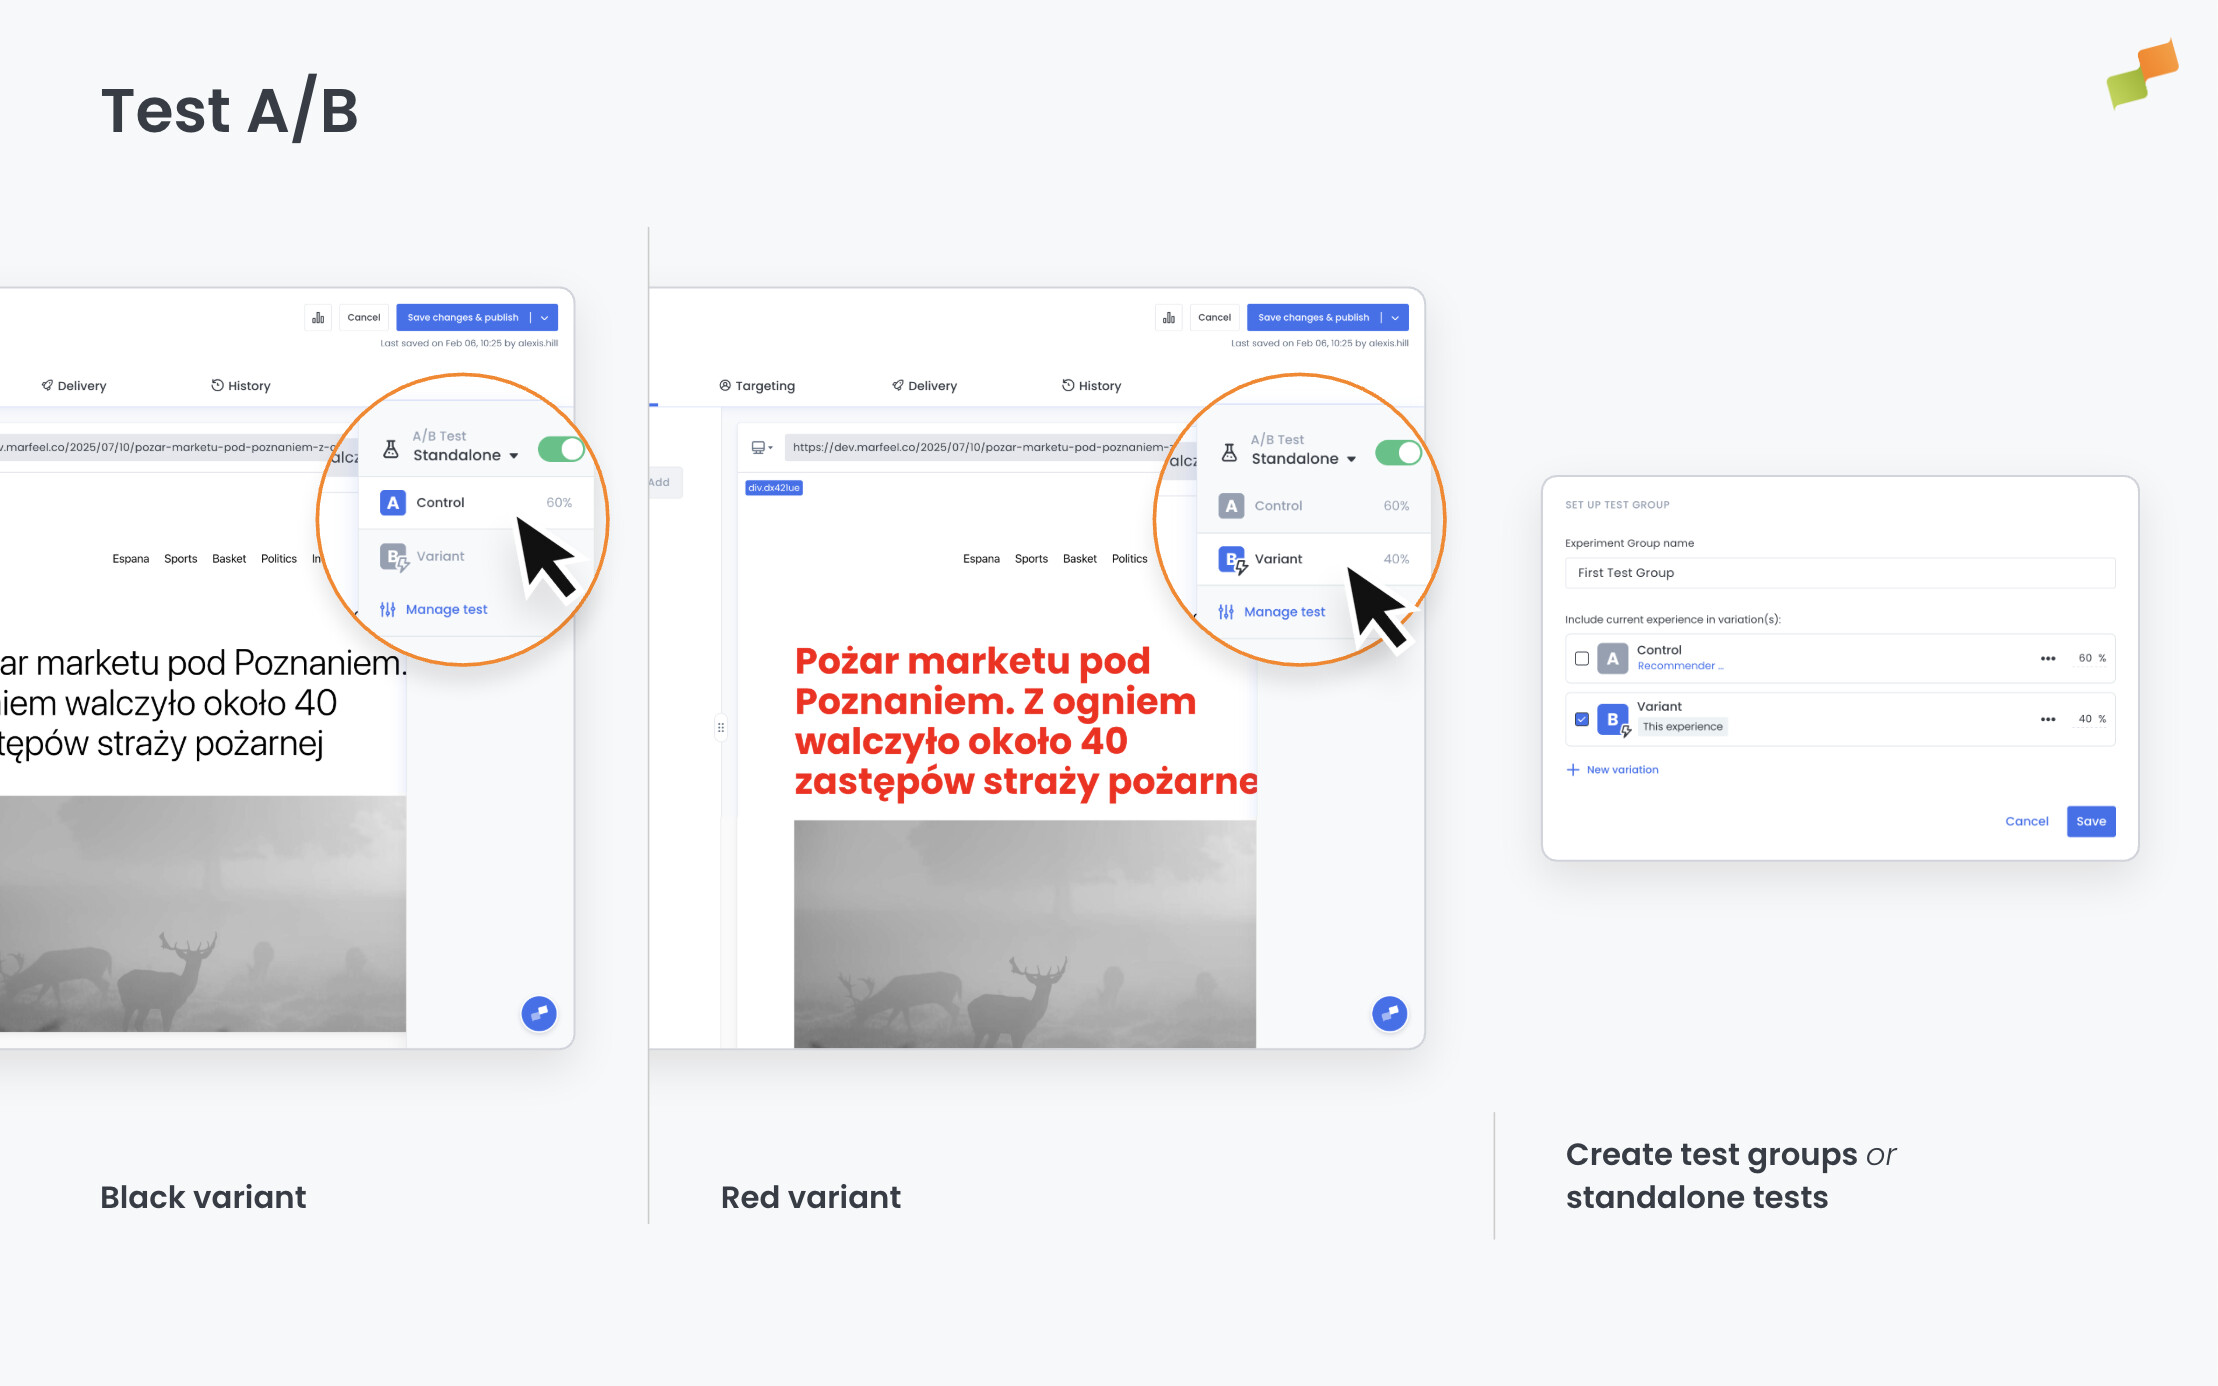
The experimentation panel
Section titled “The experimentation panel”The A/B Test panel is always visible on the right side of Experience Manager, next to the live preview.
When A/B testing is disabled, two shortcut buttons appear below the toggle:
- Original (star icon): Shows the behavior currently in production.
- Experience (lightning icon): Enables the experience on the preview so you can see how it looks before publishing.
These buttons let you quickly toggle between the current production state and the experience you’re building, without enabling a formal test.
Enabling A/B testing
Section titled “Enabling A/B testing”Toggle A/B Test on to start an experiment. You choose between two modes: standalone test or test group.
Standalone test
Section titled “Standalone test”A standalone test isolates a single experience. It splits traffic between the original behavior (control) and the experience (variant).
- Toggle A/B Test on and select Standalone Test.
- Set the Variant Assignment:
| Option | Behavior |
|---|---|
| Per Request | User may see a different variation on each request |
| Per User | User always sees the same variant |
- Adjust the traffic split between Control (original version) and Variant (this experience). For example, expose 60% of users to the experience and keep 40% as a control audience.
- Click Save.
Example 1: You want to test whether a recommender below the article increases recirculation. Set up a standalone test with 80% variant and 20% control. The 80% sees the recommender; the 20% sees the page as it was before. Compare CTR and session depth in Explore.
Example 2: You have a Flowcard that promotes a specific article to funnel traffic into it. Set up a standalone test to measure the impact on session behavior. Users in the variant group see the Flowcard and get directed to the promoted article; users in the control group don’t. Then compare session length and depth between both groups in Explore. You’ll see exactly how much the Flowcard contributes to engagement beyond the promoted pageview itself.
Test group
Section titled “Test group”Test groups bundle multiple experiences into the same experiment so they are evaluated together. Use them when you’re testing a combination of changes rather than a single experience in isolation.
For example, if you’re adding three recommender experiences to a page, you can A/B test all three together against no recommenders at all. Or if you’re combining a CTA change with a color modification (two different experiences), you can put them under the same test group to measure their combined effect.
- Toggle A/B Test on and select Test Group.
- Create a new test group or attach the experience to an existing one.
- Assign the experience to a specific variation within the test group.
Each experience in the group is assigned to a variation, and users are split across variations consistently. You can also combine experiment groups with audience targeting rules to control which user segments enter the test.
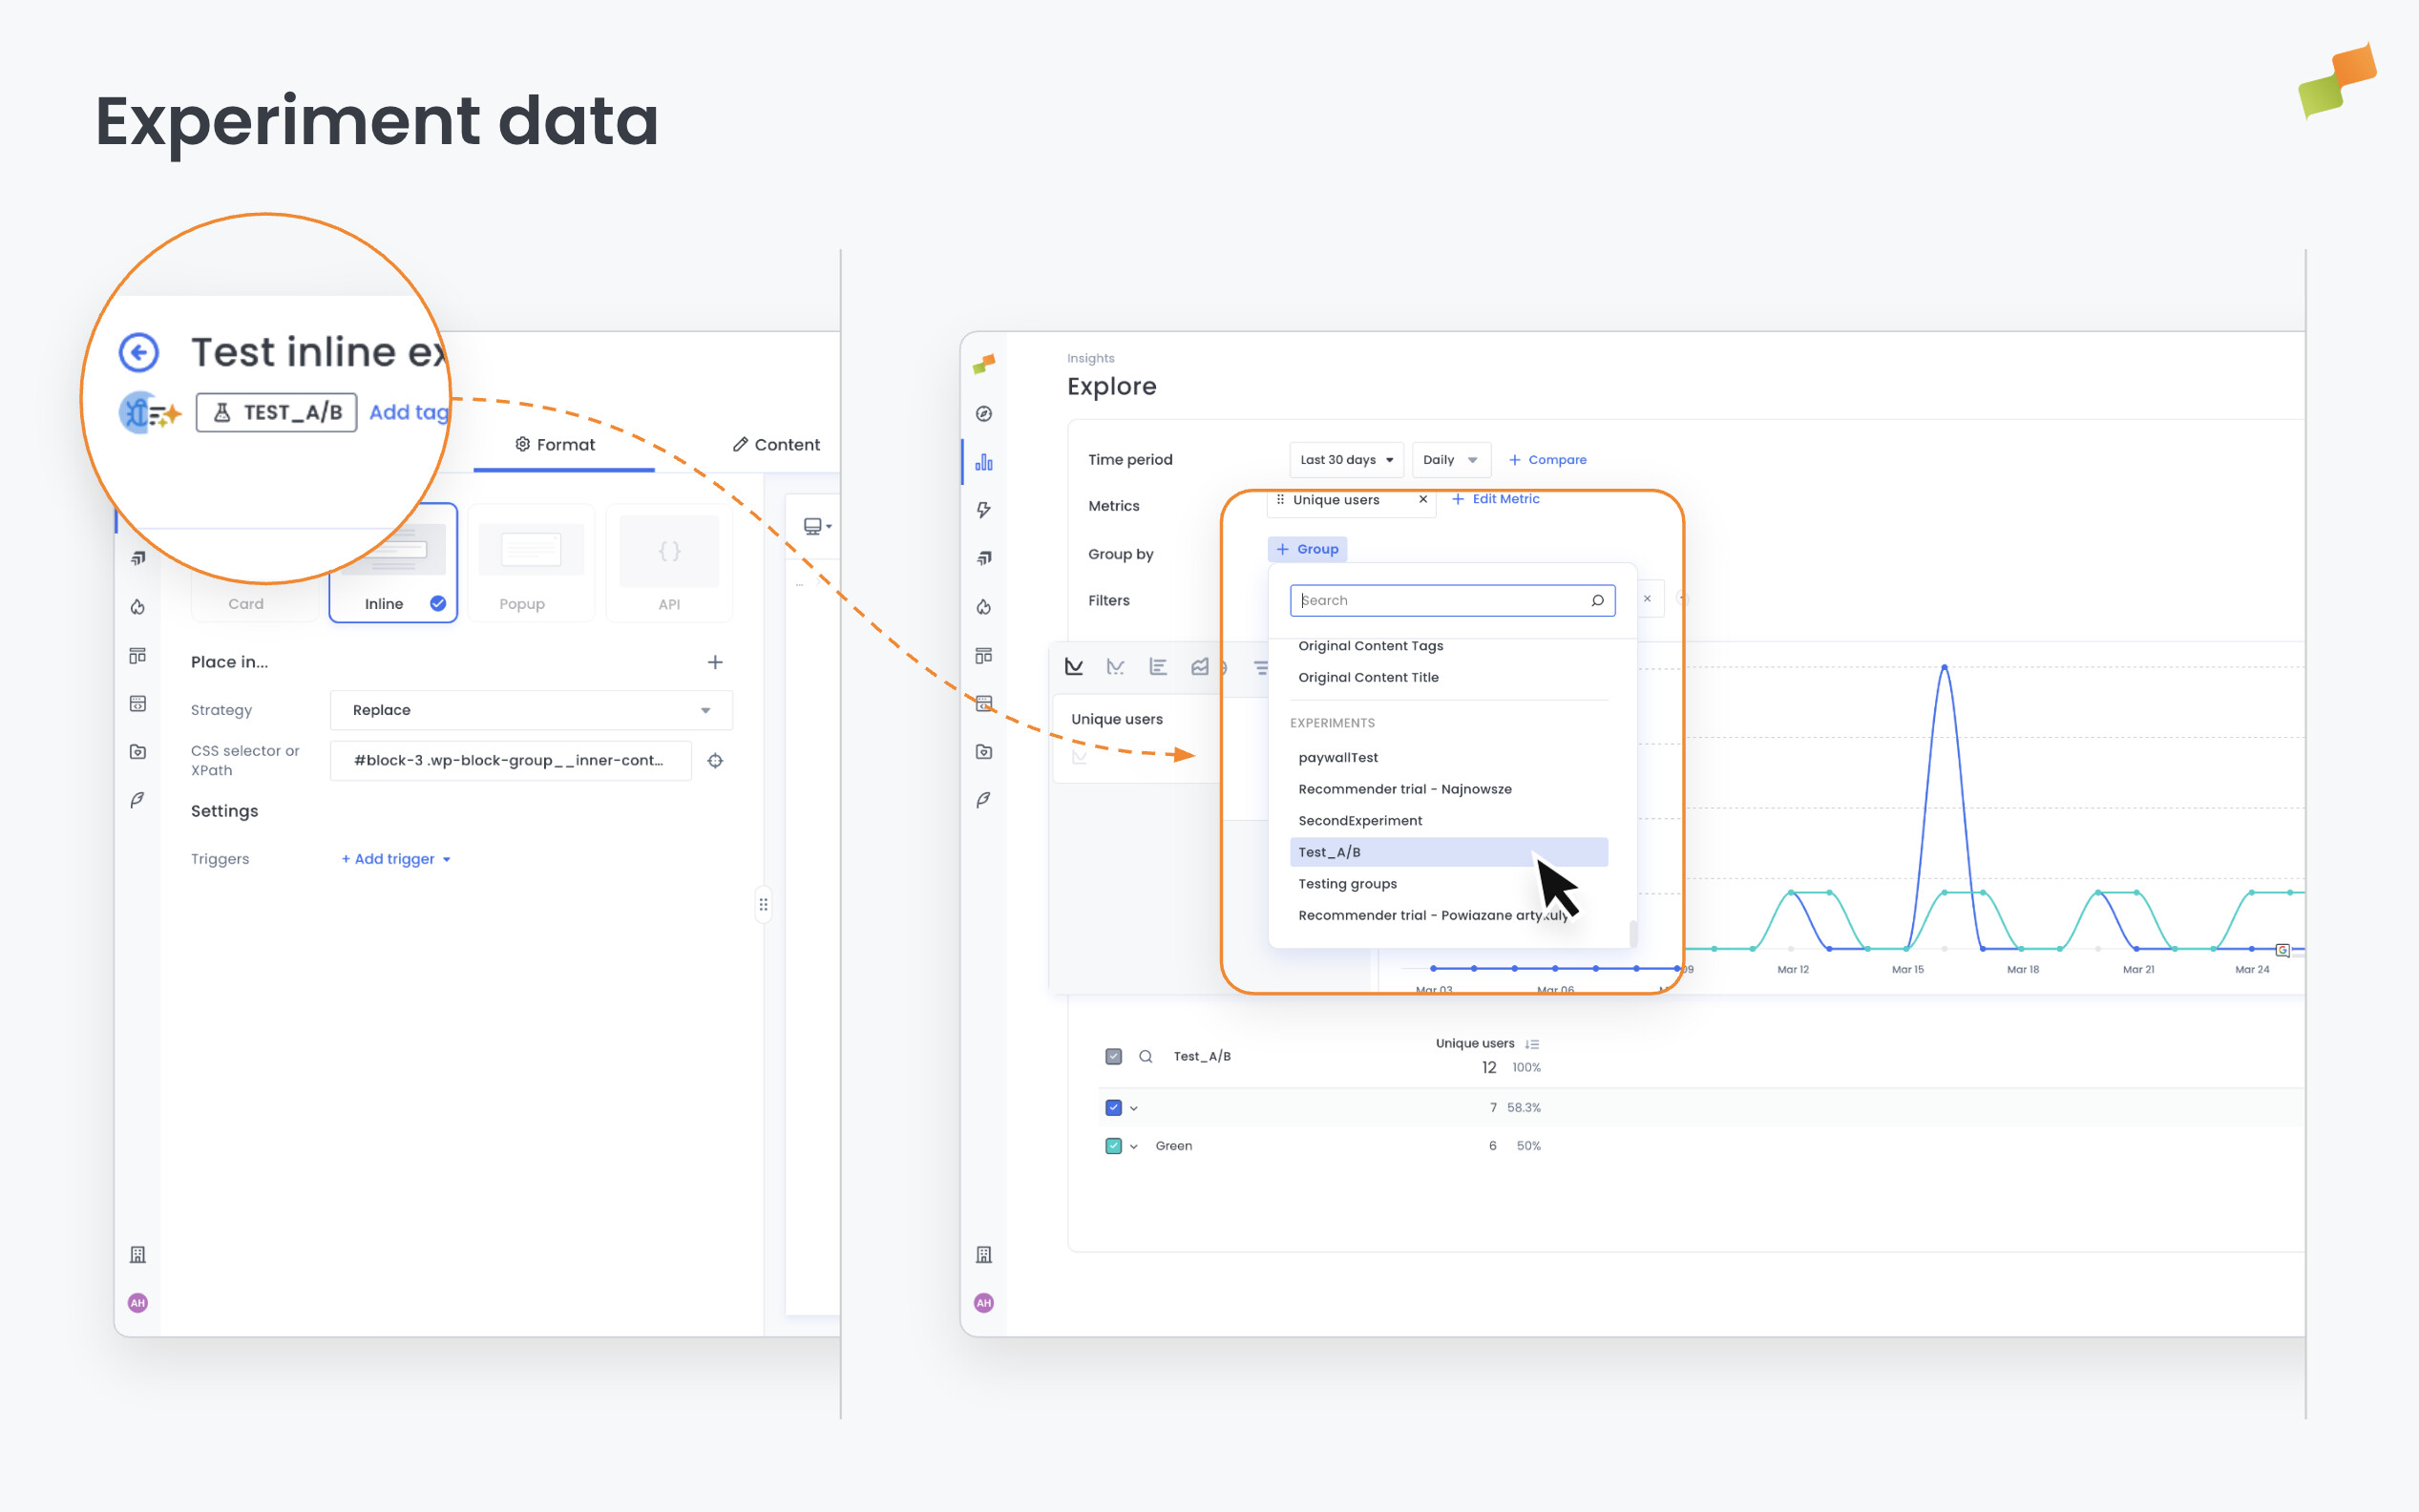
Analyzing results
Section titled “Analyzing results”Results are available through two complementary paths:
- Recirculation reports include a Test Variation dimension. Filter or break down recirculation metrics by variation to compare how each variant performs: CTR, session depth, impressions, or any other metric.
- Every test automatically sets a user variable that is inspectable through Explore. This means you can go beyond recirculation and perform full analysis across any Explore metric, segmenting by test variation or by the user variable to understand how a module performs depending on the variant a user belongs to.
Experiment data in Compass
Section titled “Experiment data in Compass”Accounts on the Recommender plan can filter and segment any Compass report by experiment group directly in the analytics dashboard — no separate raw data plan required.
To use it, open any report in Compass and look for experiment filters in the filter panel. Filter by experiment group to compare performance between variants, or combine experiment filters with your existing content and audience filters for deeper segmentation.
Before launching a test to your full audience, use the preview and live testing tools to verify the experience renders correctly on both desktop and mobile.
Accessing experiment assignments from the SDK
Section titled “Accessing experiment assignments from the SDK”Experience Manager also exposes the active experiment assignment through the Marfeel SDK. This is useful when you need to read the experiment and variant a user belongs to from client-side code, for example to enrich a custom integration, debug delivery, or align an external tool with the same experiment assignment.
Use getExperiments() on the Croupier SDK:
const experiments = await marfeel.cmd.push(['experiences', async experiences => { return await experiences.getExperiments();}]);The response is a map of assigned experiment groups, keyed by experiment group ID:
{ "id-experiment-1": { "name": "Homepage recommender test", "variant": { "id": "variant-b", "name": "Variant B" } } }If no experiment group applies to the current user, the SDK returns an empty object.
This API is read-only. Assignment is still controlled by the experiment configuration in Experience Manager, including the selected variant assignment mode, traffic split, targeting rules, and variant weights.
Going deeper
Section titled “Going deeper”- Experience Manager Overview: The four-tab editor walkthrough.
- Delivery & Scheduling
- Triggers
- Targeting
- A/B Testing
- Blueprints
- Inline: DOM injection, CSS selector placement, and visual element selector.
- Popups: Modal vs contextual modes, position, triggers, and orchestration.
- Flowcards: Isolated AMP rendering, snap points, card icons, and browser history integration.
- Tag Experiences: SDK configuration for tracking, integrations, and third-party tools.
- Recommender: Configure recommendation engines and layouts.
- Page Transformations
- Testing and Troubleshooting: Preview, live test, and debug your experiences.
- Web Activation: How the SDK delivers experiences on your site.
- AMP Activation: Run Flowcards on AMP pages.
What is the difference between a standalone test and a test group?
A standalone test isolates a single experience by splitting traffic between a control (original behavior) and a variant (the experience). A test group bundles multiple experiences into the same experiment so they are evaluated together, letting you measure the combined effect of several changes at once.
How do I analyze A/B test results in Experience Manager?
Results are available through two paths. Recirculation reports include a Test Variation dimension you can filter or break down by variant. Every test also sets a user variable inspectable through Explore, allowing full analysis across any metric segmented by test variation.
What is the difference between Per Request and Per User variant assignment?
Per Request assignment means a user may see a different variation on each page load. Per User assignment ensures the user always sees the same variant across sessions, which is important for measuring cumulative behavioral impact.